Check the package and microwave first
- Choose a microwave-safe glass bowl with a lid, then rinse the rice before adding water.
- KitchenAid gives a general ratio of 2 parts water to 1 part rice, with your rice packaging supplying specific measurements.
- For a 1000–1200 watt microwave, its method is 15 minutes on high covered, carefully uncover while watching for steam, then 10 more minutes on high.
- Let the rice sit for about 5 minutes after cooking, then fluff and serve.
Before you pour water over the grains, we'd check your rice packaging and microwave wattage. Those two checks determine whether you're using the right measurements and the appliance range for KitchenAid's cooking schedule, so they're more useful first moves than setting the timer.
The method below follows KitchenAid's microwave rice directions (opens in a new tab) for 1000–1200 watt microwaves. KitchenAid names its 1000-Watt Low Profile Microwave Hood Combination as an appliance example; the procedure uses timed cooking on high.
If your stovetop burners are already occupied, this gives the rice its own cooking space while you work on the other dishes. KitchenAid mentions both jasmine and basmati as rice you can cook in a microwave, so start with the package of rice you plan to serve and keep its measurement directions handy.
Your bowl, lid and utensils
Set out a microwave-safe glass bowl and a lid suitable for microwave use. Microwave suitability is the equipment condition to check when choosing your cooking container, and the lid is part of the preparation for the first cooking stage.
You'll also use a sieve for washing the rice and a fork for fluffing it after cooking. Put those within reach before you begin: the sieve belongs at the sink while you rinse, and the fork comes into play after the finished rice has had its rest.
Keep the rice package with your ingredients while you measure. It has a different job from the microwave directions: the package supplies specific water measurements for the rice, while the cooking sequence tells you when to heat, uncover and rest the bowl.
Mostly clear rinse water is your cue
Put the rice in the sieve and run water through it, moving the grains around with your hands as you rinse. Watch the water passing through the rice and continue until it's mostly clear. That visible change is your cue to move on to preparing the bowl.
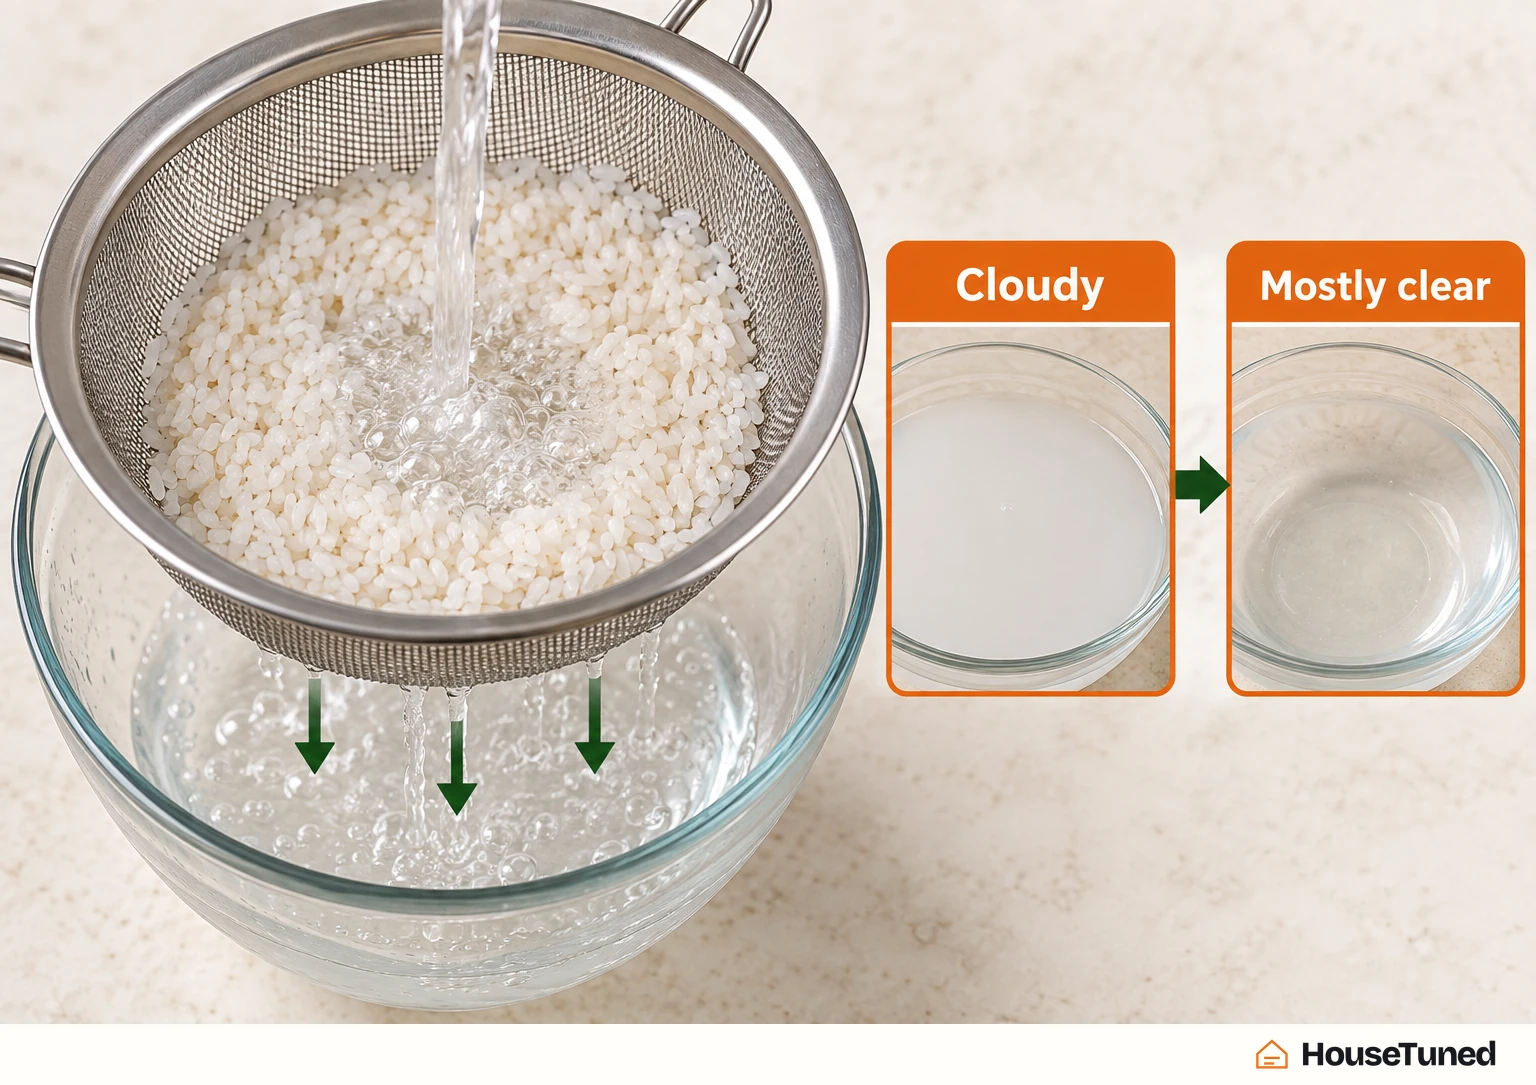
Washing removes impurities and excess starch from the grains. The starch removal matters to the finished texture: it helps you get fluffier rice, making the rinse a useful part of preparation even when you're focused mainly on the water ratio and cooking time.
If fluffier grains are what you're after, give this step your attention before reaching for an added ingredient. Rinsing addresses the excess starch already on the rice; butter or oil, discussed below, serves a separate purpose in flavoring the rice and helping keep grains from sticking together.
Read the ratio as water first, rice second
Use the general water-to-rice ratio of 2:1 (opens in a new tab) as KitchenAid's starting point, and consult your rice packaging for specific measurements. The order matters when reading that ratio: water comes first, rice second.
In cup measures, that general proportion means 2 cups of water for 1 cup of rice. Read the package before applying the general proportion, because KitchenAid explicitly directs you to the product's measurements as the alternative.
KitchenAid's preparation step separately calls for 2 cups of cold water, again offering the rice label's ratio as the alternative. Keep the roles of those instructions clear: two cups is the amount in that preparation step, while 2:1 describes water in relation to the rice you're measuring.
The ratio answers how to measure the ingredients; use the timed sequence below for the cooking stages. Keeping those decisions separate helps you follow the package's water measurements without turning the ratio into a rule for changing the microwave time.
Optional flavor goes in before cooking
Transfer the fully rinsed rice to your bowl. Butter or kosher salt is optional in KitchenAid's preparation directions, so you can choose whether you want either before adding the water and putting on the lid.
Butter has a practical role as well as adding flavor: it helps keep the rice from sticking together. KitchenAid also lists oil for those same purposes, giving you another option if you want an addition to the plain rice.
Add the measured cold water and cover the bowl with its lid. At this point, the rinsed rice, water and any optional additions should all be together in the covered cooking bowl, ready for the first timed stage.
Two heating stages with a lid change
For a 1000–1200 watt microwave, follow KitchenAid's cooking sequence (opens in a new tab) in order. There are two separate heating stages, with an uncovering step between them; both stages use high power.
- Put the prepared, covered bowl in the microwave. Cook on high for 15 minutes, until the first timed stage ends.
- Carefully lift off the lid, being mindful of the steam as you uncover the rice. Leave the bowl uncovered for the next stage.
- Microwave a second time for 10 more minutes on high, until the second timed stage ends.
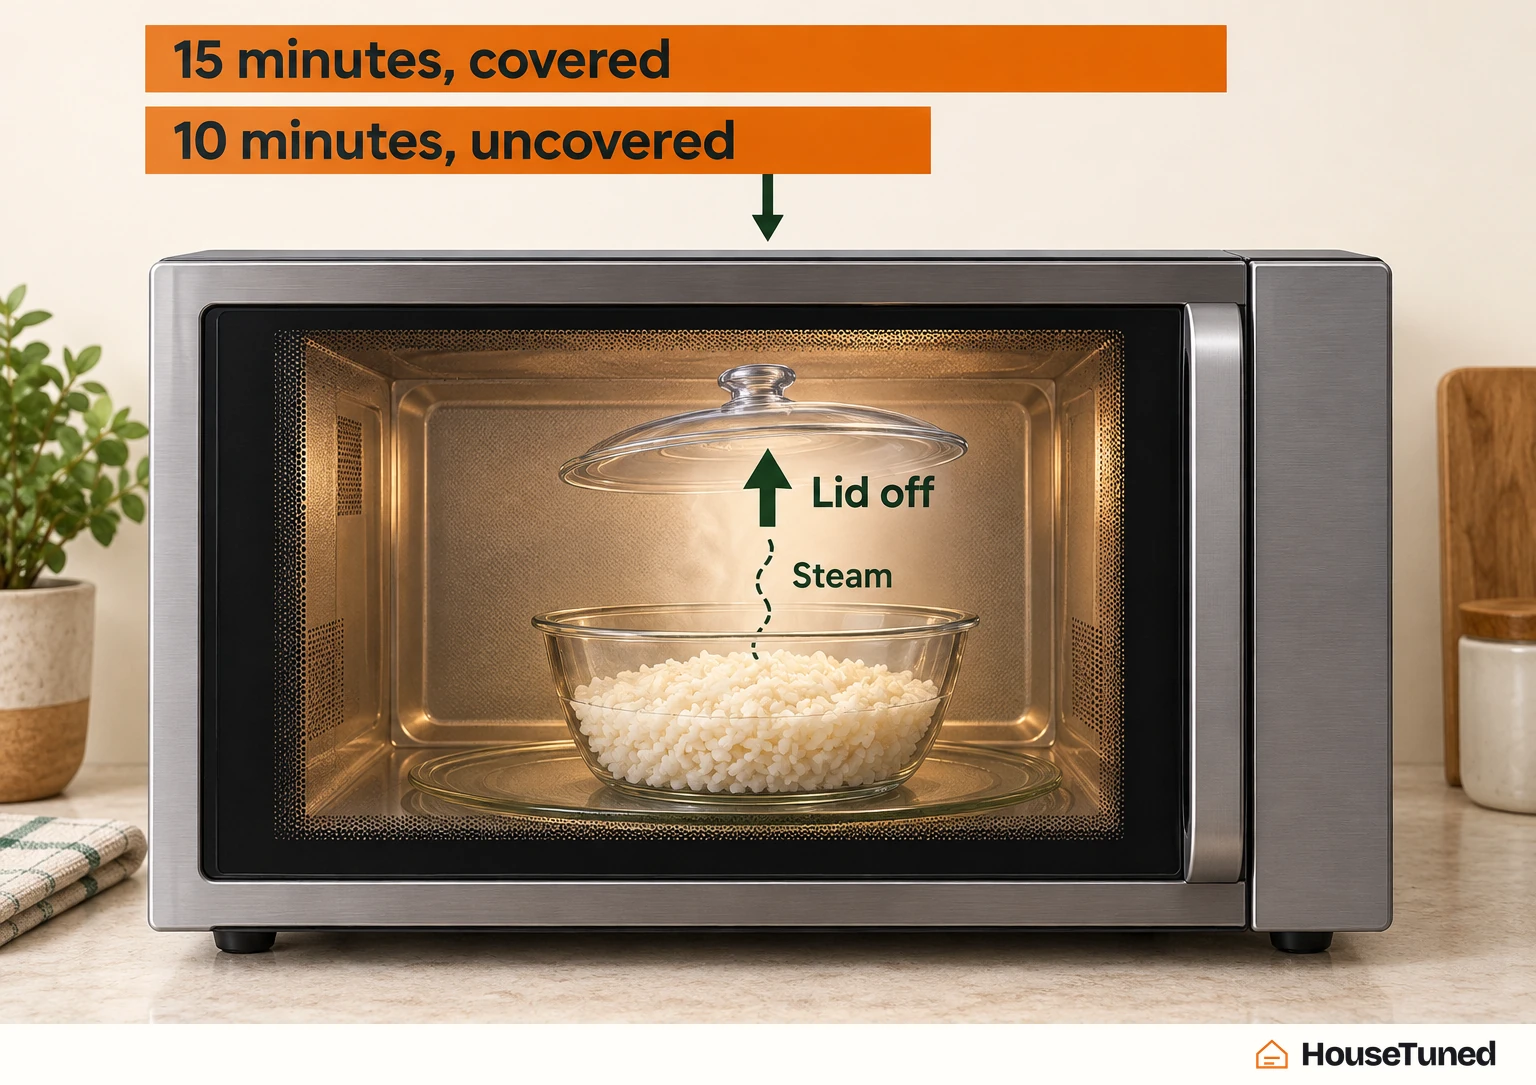
Plan for 25 minutes of microwave cooking, plus the rest afterward. The lid change is the reason to treat this as two stages when setting your timer: you have an action to take between the first cook and the second.
Give the rice its rest before serving
Once the second cooking stage finishes, allow the rice to sit for about 5 minutes. Leave the fluffing until after that pause, following the order of cooking, resting and then finishing the grains.
With the heating stages and rest together, allow about 30 minutes after cooking begins, plus your preparation time. That's the useful interval to keep in mind when coordinating the rice with the other food you're serving.
KitchenAid lists the recipe's yield as 3 cups of cooked rice, or 4 servings. Use that stated yield when deciding how the rice fits into your meal.
After the rest, use a fork to fluff the rice and serve it immediately.
More in this category