Use Defrost with regular checks
- For raw frozen chicken pieces, remove the packaging, use a microwave-safe container and select Defrost.
- Follow your microwave’s food-type and weight prompts, then pause every few minutes to turn and check the chicken.
- Once it’s thawed, remove it and fully cook it immediately.
If dinner is coming straight from the freezer, we’d use the preset with regular hands-on checks because microwave thawing can leave some areas warmer than others. The setting handles the cycle, while your checks help you catch uneven progress before you leave the chicken heating longer than it needs.
Maytag describes microwave thawing as safe when you follow proper handling practices. Before loading the dish, check the chicken’s size and whether it has been sitting at room temperature, because those two details can change whether this method is appropriate.
Check the size and time spent out
For a whole bird, choose another thawing method. Whirlpool does not recommend microwave thawing for a whole chicken (opens in a new tab), even though it’s possible, because large cuts can warm faster outside than in the middle.
That difference matters before you even choose a timer. Some areas can begin cooking while others are still thawing, or become warm enough for harmful bacteria to develop. A larger piece brings an uneven-warming concern as well as a longer thaw.
For chicken left at room temperature, Maytag’s restriction (opens in a new tab) uses both “20+ minutes” and “more than 20 minutes”; KitchenAid’s restriction (opens in a new tab) says “over 20 minutes.” Both direct you to refrigerator or cold-water thawing instead of the microwave.
Save the weight before unpacking
Read the poultry package’s directions before throwing it away, and follow those instructions alongside your microwave’s defrost guidance. The package supplies the chicken’s handling directions, while the appliance’s owner’s manual supplies the controls for your machine.
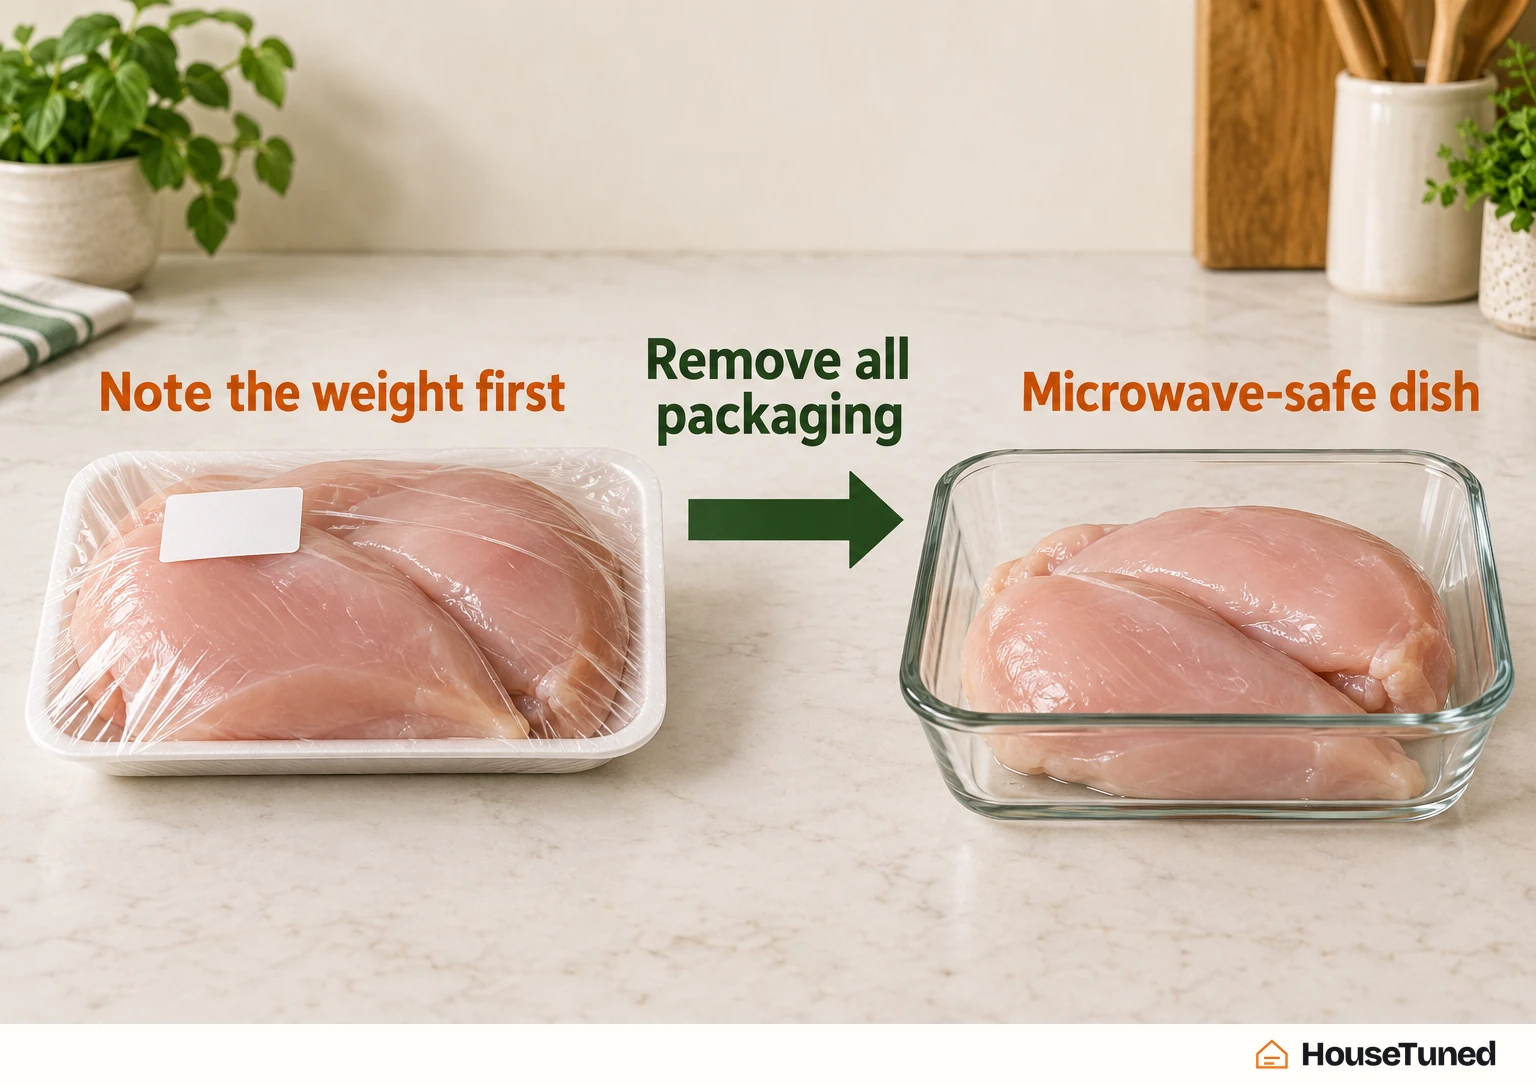
Note the chicken’s weight from the package, or measure it with a food scale. Many presets use that weight to set the cycle, so this is useful information to save before you’re standing at the microwave with the chicken already unpacked.
With clean hands, remove all the original packaging. Whirlpool specifically prohibits defrosting chicken in its original packaging (opens in a new tab), so keeping the weight information and keeping the wrapper are separate decisions: save the information, then transfer the chicken to a suitable container.
Your container needs to be microwave-safe
Put the chicken in a microwave-safe dish. Maytag identifies glass or ceramic bowls as typically working best for thawing, while Whirlpool and KitchenAid also include microwave-safe plastic storage containers among the suitable options.
Choose by microwave suitability as well as material. The container requirement applies to the glass bowl, ceramic dish or plastic container you actually plan to use, so make that check before placing the chicken inside.
For a zipper-top bag, check the bag manufacturer’s microwave-use guidance first (opens in a new tab). Some bags may be suitable, but that permission depends on the bag; use a microwave-safe dish if you haven’t confirmed the bag’s suitability.
Follow the prompts on your panel
Select Defrost and follow the choices your panel displays. Many microwaves ask for food type and weight, but the wording and available prompts vary, so keep your appliance’s instructions in view when choosing the program.
Maytag’s preset guidance (opens in a new tab) describes entering chicken as the food type, followed by its weight. Whirlpool and KitchenAid describe poultry or meat choices on many microwaves, with the defrost cycle starting automatically after the required information is entered.
Use the weight you saved or measured during preparation when the preset asks for it. Some microwaves calculate the defrost time from the food information you supply, so the weight entry has a practical job beyond identifying what’s on the plate.
If your panel doesn’t offer those choices, consult your owner’s manual for the appliance’s defrost directions before continuing. These general instructions describe the preset route; the controls you use should match your own microwave.
Why the preset still needs your attention
The Defrost function described by KitchenAid cycles the microwave’s heat-producing component on and off (opens in a new tab). That reduces the power used during thawing compared with higher-power cooking settings, which explains why a dedicated thawing cycle behaves differently from ordinary cooking.
Even with the preset selected, the chicken can warm unevenly. The controls and the turning checks do different jobs: the program manages the cycle, while changing the chicken’s position helps promote a more even thaw.
How long to allow
Allow roughly 8–10 minutes per pound for planning. Maytag’s timing guidance (opens in a new tab) qualifies that estimate by the chicken’s weight and your microwave’s wattage; the cut of chicken can also affect how long thawing takes.
For a concrete example, Maytag gives about 12–15 minutes for a 1.5-pound chicken breast. Whirlpool’s two-pound example (opens in a new tab) is about 16–20 minutes, with a poultry preset potentially setting the time automatically after you enter the weight.
Those ranges help you work out how the thaw fits into meal preparation. Use the chicken’s condition to decide when to finish: the timer supplies an estimate, and regular checks tell you whether the meat has reached the thawed stage.
Turn the chicken and check inside
Every few minutes, pause the microwave and carefully flip or rotate the chicken. This helps it thaw more evenly and gives you a chance to check its progress while the cycle is underway.
If the turntable is off, rotate the dish during the pause. If your microwave has no turntable, KitchenAid recommends manually rotating the container (opens in a new tab) as well as carefully flipping the chicken to encourage even defrosting.
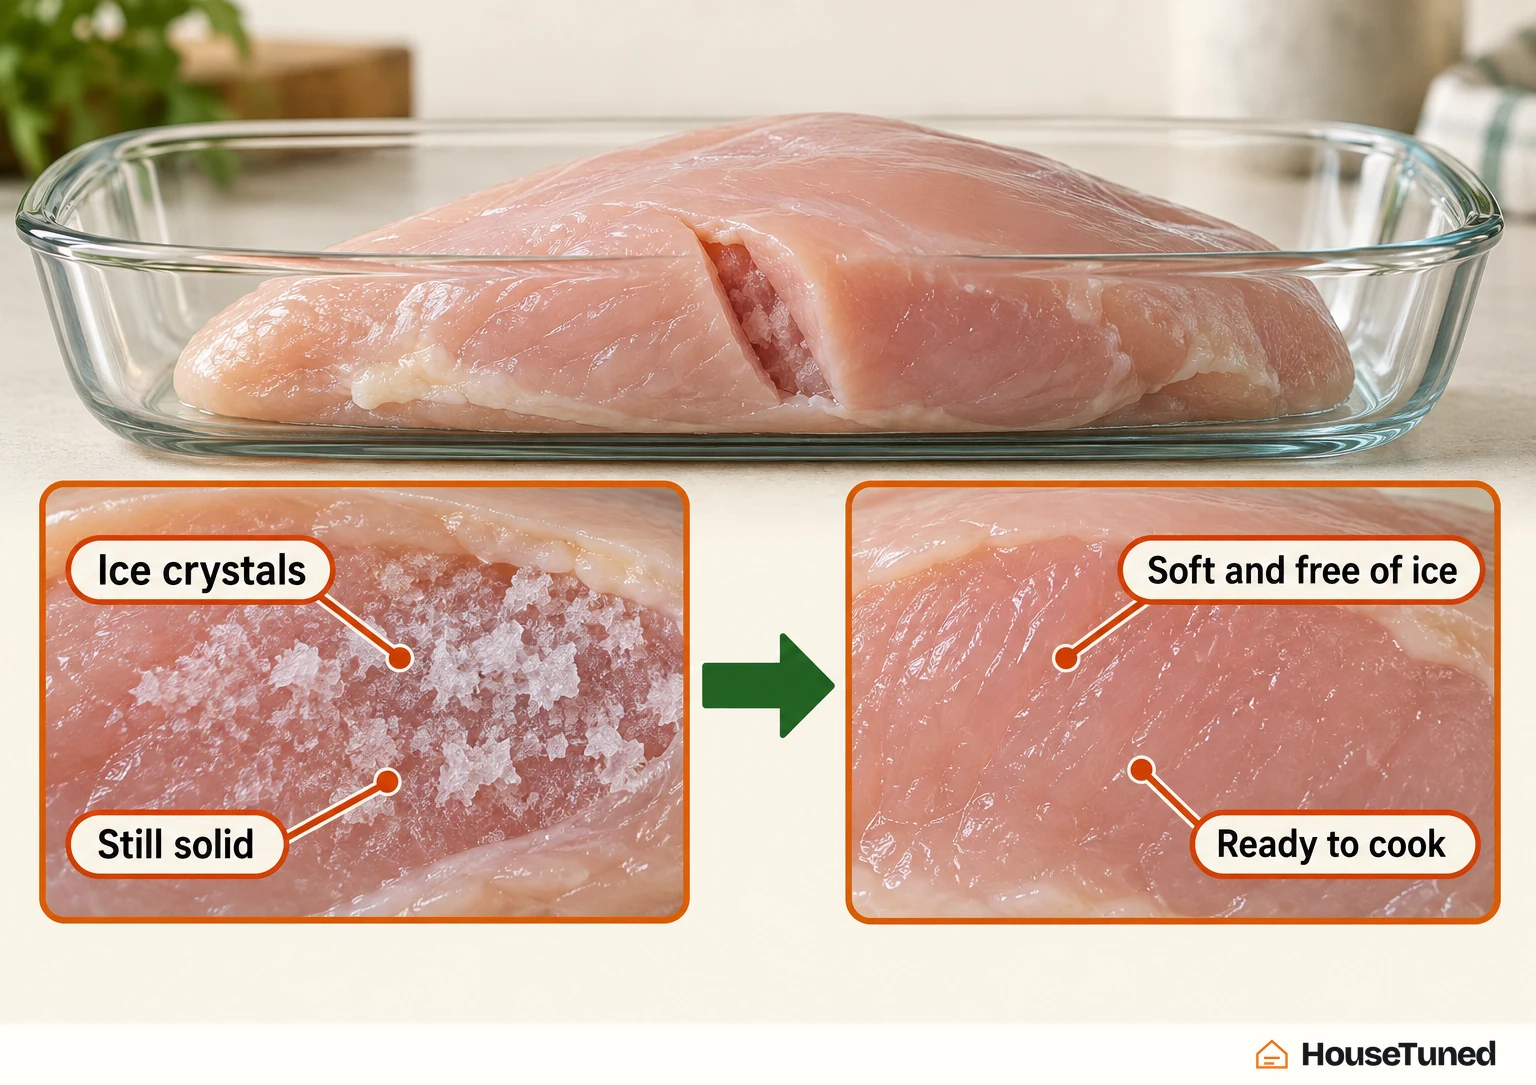
For the endpoint check, cut a small sliver in the thickest part and look for ice crystals and hardness (opens in a new tab). Chicken that’s soft to the touch and free of ice is likely thawed and ready to cook; if that thick part still feels solid, continue defrosting.
Cooking comes immediately after thawing
Promptly remove thawed chicken from the microwave and begin fully cooking it. Microwave thawing can leave warmer areas where bacteria can develop, so immediate cooking is part of handling the thawed chicken safely.
That direction also applies after an uneven thaw. Whirlpool says to fully cook unevenly defrosted chicken immediately (opens in a new tab), while warning that some areas will likely become overcooked and develop a tough or rubbery texture.
If your next decision is whether to leave microwave-thawed chicken for tomorrow’s meal, keep going with cooking now. KitchenAid explicitly makes immediate cooking a requirement for chicken thawed this way.
More in this category