Cold zones first, then make food easy to see
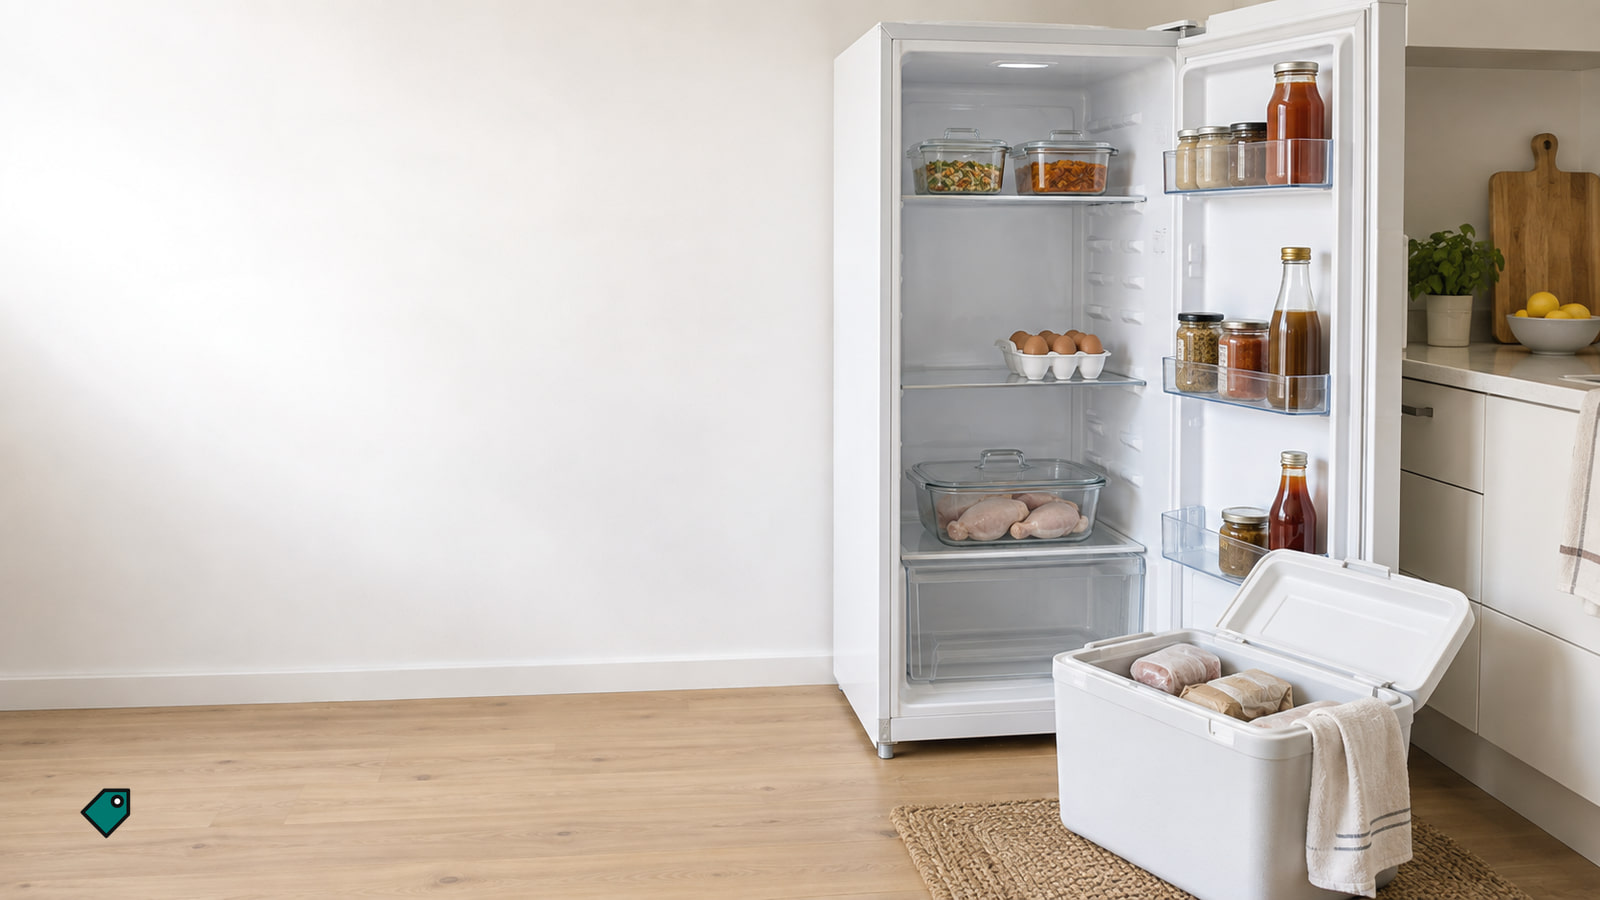
- Clear and wipe the fridge one section at a time, with a cooler holding the most perishable food.
- Raw meat, poultry and seafood go on the bottom shelf, in a container that catches juices.
- Leftovers and ready-to-eat food go up top. Condiments and other sturdy items go in the door.
- Keep eggs on an interior shelf, never in the door.
- Keep the fridge at 40°F or below, because warmer raises the chance of spoilage.
When perishable food sits out of sight, it's easy to forget until it's past its date. We'd sort out the bottom shelf before anything else. It's typically one of the coldest spots, and raw meat kept there in a container can't drip onto food you'll eat without cooking.
Everything else comes down to two facts. Lower shelves run a few degrees colder than upper ones, and the door's temperature swings more than anywhere else in the fridge. Layouts differ between fridge types, so learn which parts of yours stay coolest before you decide where things go.
Get a cooler and a plan before the door opens
While you're cleaning out the fridge, your most perishable food needs somewhere cold to wait. Get everything ready before you start pulling things out.
- An ice cooler to hold the most perishable items while their shelf is empty
- A trash bag for anything expired or spoiled
- Something to wipe down the shelves and drawers
- Paper towels or other absorbent liners for the drawers and the meat shelf
- Clear bins and labels, if you plan to use them
Work in sections instead of tackling the whole fridge at once, and start with the spots where your most perishable food will go. Try not to leave the door standing open between trips.
Clearing and wiping one section at a time
Clean, empty shelves give you a fresh start, and cleaning can help keep bacteria and mold from building up and spoiling fresh food.
- Move the most perishable food from your first section into the cooler, so the shelf is empty and that food stays cold.
- Throw out anything expired or spoiled as you go, so it never makes it back into the fridge.
- Wipe down the shelf or drawer until it's clean and ready for food.
- Line the drawers, and the shelf that will hold meat and poultry, with paper towels or another absorbent liner so drips and spills soak into something you can throw away.
- Reload that section using the zone rules below before moving to the next one, and keep the door shut between trips.
Change the crisper liners every week or so. Drawer bottoms get dirty fast, and a fresh liner saves you a messy scrub later.
Check the temperature before you reload
The shelf rules only help if the whole fridge is cold enough. The right setting slows the growth of bacteria and mold.
You'll see two federal ranges. Energy Department buying guidance gives 36°F to 40°F and adds that going colder wastes energy without helping your food. ENERGY STAR and the Energy Department's home kitchen tips use 35°F to 38°F.
We'd aim for 36°F to 38°F, since that sits inside both ranges.
What goes on each shelf
A good way to think about the shelves is by how much cooking the food still needs. Food you'll eat cold or barely cook goes high. Raw food that has to be cooked hottest goes lowest, where it's coolest.
The upper shelves are for leftovers, prepared foods, ready-to-eat items and drinks. If you'd like to see it laid out, there's a handy shelf-by-shelf layout (opens in a new tab) to compare against your own fridge.
Raw meat, poultry and seafood go on the bottom shelf, which is typically one of the coldest parts of the fridge. Keep meat in glass or plastic containers so juices can't leak onto other food.
Dairy, eggs and deli foods take a little more thought, because makers place dairy differently.
| Food | Where it goes | Why |
|---|---|---|
| Eggs | An interior shelf, ideally the middle one | They need a steady temperature to stay fresh |
| Milk | A lower interior shelf, toward the back | It's colder there, which helps preserve it and slow fermentation |
| Yogurt, sour cream, cottage cheese | Lower shelves on Whirlpool's plan, the middle shelf on Maytag's | Placement varies by maker, so pick one interior shelf and keep it consistent |
| Fresh-squeezed juice | The bottom shelf | Helps preserve it and slow fermentation |
| Deli meats and cheeses | The deli drawer, if your fridge has one | It should run slightly colder than the rest of the fridge |
Keep similar everyday foods together on the shelves so you can find what you're after without digging.
Save the door for sturdy items
The door's temperature swings more than anywhere else in the fridge, so fill it with things that can handle that: ketchup, mustard and other condiments, nut butters, pickles, olives, capers, pasteurized juices, soda, beer and other drinks.
Butter and soft cheeses are fine in the door too, or you can keep them in the deli drawer.
Makers don't agree about milk. Whirlpool says to keep it out of the door and on the bottom shelf. KitchenAid says milk is fine in gallon-size door bins when your model is built for it, while Maytag calls the door a good place for frequently used milk, stored in large gallon door bins like those on select Maytag fridges.
Our advice is to keep milk on a lower interior shelf toward the back, where it stays colder, and give the door bins to drinks and condiments that handle the swings better.
Crisper drawers sorted by humidity
Fruit and vegetables keep fresher in the crisper or humidity-controlled drawers, with some kinds kept in high humidity and others in low.
Most fridges have two crisper drawers. If yours have adjustable humidity, set one high and the other low. Either way, keep the two groups below in separate drawers.
- High humidity: thin-skinned and ethylene-sensitive produce, such as leafy greens, lettuce, herbs, spinach, broccoli, asparagus, strawberries, grapes and citrus
- Low humidity: ethylene emitters and thick-skinned produce, such as apples, pears, stone fruit, avocados, melons, cantaloupe and peppers
Keeping them apart matters because emitters give off ethylene gas as they ripen, and that gas can make nearby produce rot faster.
Fill each drawer only about two-thirds full so the produce has room to breathe. Some produce shouldn't go in the fridge at all, so check before you load the drawers.
Bins, labels and an eat-first spot
Bins are optional, but clear ones sorted by food type make the fridge easier to keep tidy, because you can scan a shelf instead of rummaging through it.
Take food out of cardboard boxes and bulky plastic containers where you can. You'll free up space and keep the shelves from getting crowded.
Label every bin or container with what's in it and its dates, either the day it went in plus the expiration date, or the use-by date.
Next, set up an eat-first bin. Label a clear bin "eat first," put it on a front shelf where you'll see it, and fill it with whatever will expire soonest. It keeps those foods on your mind so you use them before they go bad.
A revolving tray at the front of a shelf puts small jars within reach and works for heavier bottles of oil and vinegar too. Small baskets hold little items together, and on some racks you can use binder clips to hang bags of lettuce, kale or shredded cheese, which also keeps them sealed. You'll find more ideas like these in these fridge organizing tips (opens in a new tab).
A grab-and-go bin for snacks like baby carrots, hummus, yogurt, grapes and berries keeps favorites within arm's reach.
Keeping it organized week to week
You're more likely to grab whatever's in front, so rotate every time you put groceries away. Move older items to the front and put newer ones behind them.
Keep it up and you'll have a tidy fridge where food stays in sight, kids can reach their snacks, and you can plan the week's meals knowing what you actually need to buy, which helps cut food waste.
Before you start a recipe, check the eat-first bin and cook with what's in it.
More in this category