Watch what happens after a flush
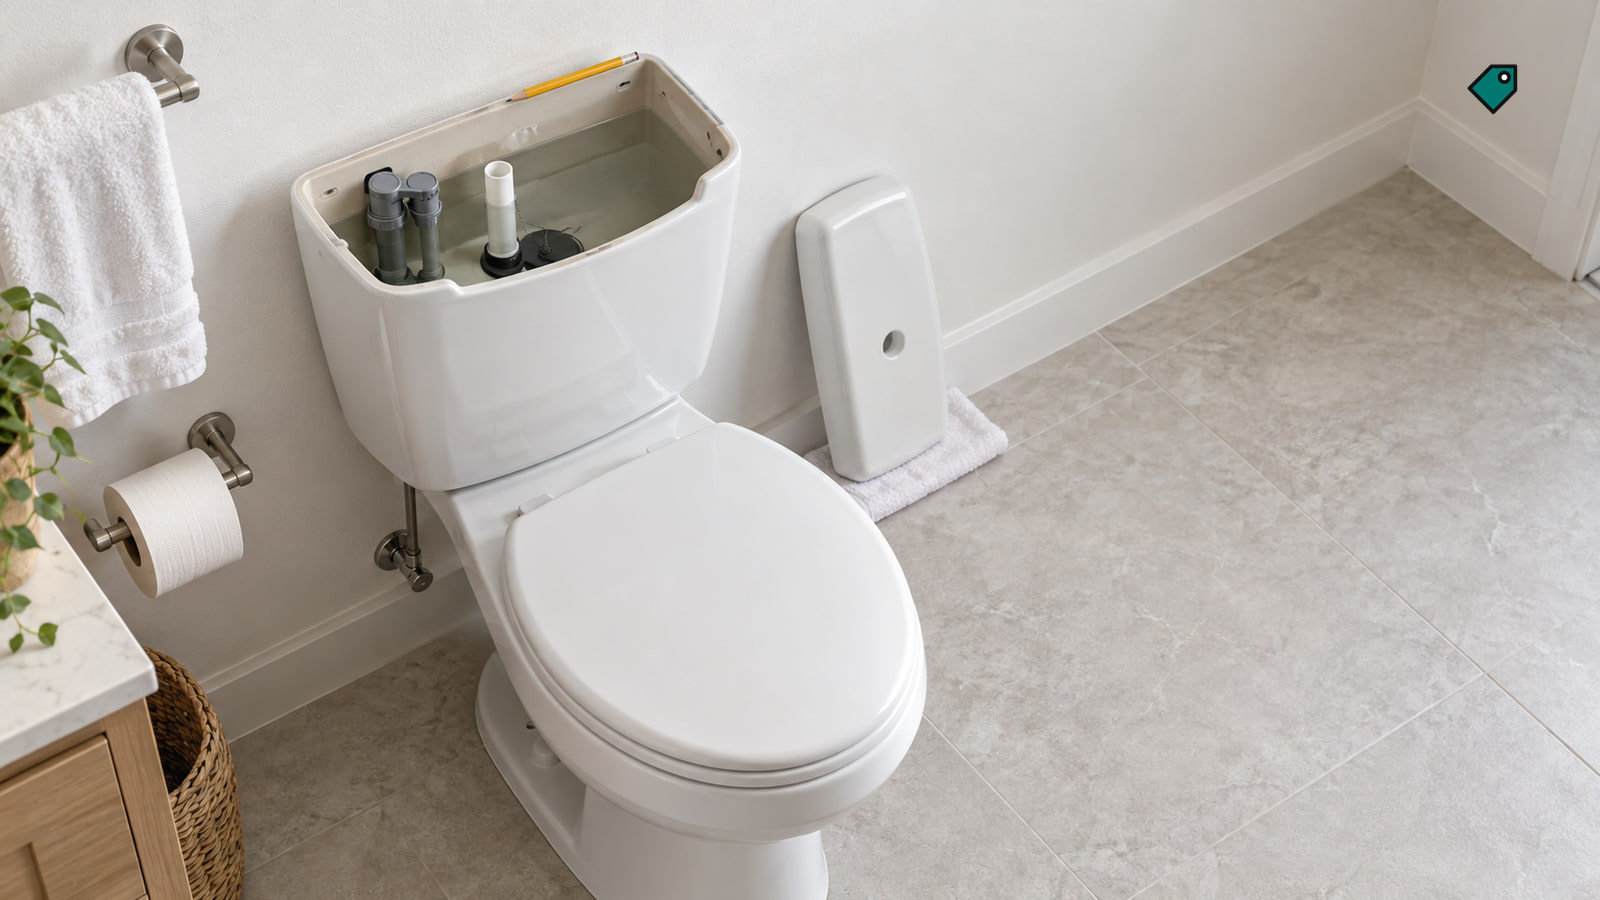
- Lift the tank lid and watch what happens after a flush. Water that keeps entering the overflow tube after the tank is full points toward the float or fill valve.
- If the toilet goes quiet but starts refilling again later, check whether water is leaking from the tank into the bowl past the flapper or flush seal.
- Use a dye test or a pencil mark on the tank waterline before choosing a part.
The timing gives you a useful clue: does filling continue when the tank is full, or does it stop and start again later? We’d follow the water before buying a fill valve, because a leaking flush seal can lower the tank level and make a working fill valve turn back on. Watch one flush and note which pattern you see.
Look inside the tank as it refills. The key moment is when it reaches its full level: continued flow then points toward the fill side, while a later refill calls for a tank-water-loss check.
Why it starts filling again
The flapper or flush valve seal closes the opening that lets tank water into the bowl. If that seal leaks, the tank level falls. The float falls with it and turns the fill valve on again, which explains why you may hear water running even though nobody flushed.
A worn flapper or flush seal is one possible cause of that stop-and-start pattern. A flapper held open by its chain, a poor fit at the flush valve opening, or trouble at the sealing surface can also keep the opening from sealing.
The other pattern starts while you’re watching the tank fill. If water keeps flowing after the tank is full, the float may be set too high, obstructed by debris, or failing to shut the fill valve off. That observation points you toward the fill side instead of a tank that quietly loses water between flushes.
Use dye to check for a leak into the bowl
For a toilet that refills on its own, put a couple of drops of food coloring or a dye tablet into the tank. Wait 10 minutes without flushing, then look in the bowl. Color there shows that tank water is leaking into the bowl.
Flush after the test so the dye doesn’t stain the inside of the tank. If color reached the bowl, inspect the flapper or flush seal, its fit, the chain if there is one, and the surface it closes against before choosing a replacement.
If the bowl stays clear, watch a flush and the full tank again. Water that continues to enter the overflow tube after filling needs the fill-side check below; the dye test is aimed at finding water that escapes from the tank into the bowl.
Mark the tank level to narrow down the leak
A pencil mark gives you a second way to follow a suspected leak. It shows whether the tank level falls while the supply is off, and a longer observation can point to the height where water is escaping.
- Flush the toilet and let the tank finish refilling. Mark the water level inside the tank with a pencil so you have a starting line to compare.
- Turn off the toilet’s water supply valve and wait at least 25 minutes. Check the mark: a lower waterline means a part in the tank is leaking.
- If the level has fallen, leave the water off for a couple of hours and look again. Note whether the water stops near the flapper or flush seal, at a point on the overflow tube, or near the bottom of the tank.
Water that drops to the flapper or flush seal points to replacing that seal. If it falls to a point on the overflow tube or the bottom of the tank, the flush valve is the indicated replacement instead. The stopping level matters because these results call for different parts.
A new flapper can still leave a gap
If the dye or water-level test points to the flush seal, identify what closes your toilet’s flush valve. A toilet with a flapper needs one that matches the size of the flush valve opening. A tower or canister valve uses a seal made for that specific model.
On a flapper-style toilet, look at how the chain sits when the flapper is closed. Too much tension can hold the flapper open; loose links can fall into the opening and stop it from sealing. Korky recommends one to two links of slack, so check the chain’s position along with the flapper’s fit before deciding the flapper itself needs replacing.
These checks are useful even if a new flapper hasn’t stopped the running. A correctly sized part still needs to sit against the opening without chain links underneath it. If your tank uses a tower or canister, choose its model-specific seal instead of a flapper.
Look where the seal meets the opening
Look at the surface where the flapper or seal closes. Debris or mineral deposits there can interfere with the seal, so a dirty opening points to cleaning as the next repair. Cracks, warping, or other visible damage point to replacing the flush valve.
This is a useful check when the flapper fits and the chain sits clear, but the tank still loses water. Pair what you see at the opening with the pencil-mark result: water that falls to the seal and water that falls to the overflow tube or tank bottom lead to different repair choices.
Water keeps flowing after the tank is full
When the flapper is sealing but the toilet keeps running, flush and watch the tank refill. Let it reach its full level before judging the flow. Water continuing after that point is the clue to check the float and fill valve.
The float may be set too high, have debris interfering with it, or fail to shut the valve off. Those possibilities lead to fill-valve adjustment, cleaning, or replacement as the next repair choice. Flow you see while the tank is still refilling is part of this observation; the decision turns on what happens once it’s full.
If water continuously flows into the overflow tube, investigate that fill-side problem further. It’s a different clue from a toilet that becomes quiet after a flush and only refills again when the tank level has dropped.
Let the clues guide the repair
Use the observations to choose the next repair: a leak stopping at the flapper or flush seal points to that seal, while a level falling to the overflow tube or tank bottom points to the flush valve. Continued filling after the tank is full points to the float or fill valve. Match any replacement seal to the valve in your tank.
If the toilet keeps running after these checks, contact a local plumber. Tell them whether dye reached the bowl, where the water stopped during the supply-off test, and whether filling continued after the tank was full.
Check that the running has stopped
After the indicated repair, flush and watch the tank refill. The fill flow should stop when the tank is full, and the water level should stay up instead of triggering another refill.
Repeat the dye test to check for a quiet tank-to-bowl leak: add a couple of drops of food coloring or a dye tablet, wait 10 minutes, and look for color in the bowl. Flush afterward to avoid staining the tank.
More in this category