Give a limp bottom a hot surface
- Preheat an empty, foil-lined baking sheet in the oven at 450°F, then carefully add your slices to the hot sheet.
- Heat until the cheese starts bubbling, about 10 minutes, then check the crust's firmness.
- Give thin crust with heavy toppings extra attention as it reheats. The base can dry out while the toppings are still warming.
If your leftover slice has a limp bottom, we'd choose the preheated-sheet method because the hot bakeware helps crisp the base while the toppings reheat. That gives the crust help where it needs it, underneath, instead of making the melted cheese your only measure of progress.
The finish you're aiming for has two parts: bubbling cheese on top and a crust with the firmness you like below. Those cues give you something useful to judge as the pizza reheats, especially when the slice in front of you differs from the one you warmed last time.
Your slice determines how closely to watch
Look at the thickness of the base and how much sits on it before you begin. Whirlpool gives a typical oven reheating range of about 7–12 minutes after preheating, with crust type, topping load and oven temperature affecting how long the pizza needs.
Use the differences below to decide what deserves your attention. A thin slice and a lightly topped slice will likely heat faster, but a thin base piled with toppings has two parts that can warm at different rates. Thickness and topping load belong in the same decision.
| Slice | What changes |
|---|---|
| Thin crust | Will likely reheat more quickly. |
| Fewer toppings | Will likely reheat more quickly. |
| Thin crust with heavy toppings | The toppings will likely reheat more slowly than the crust. |
A previous batch's timing is therefore a starting reference, not a finish line for every pizza. A lightly topped slice may need less time than you're used to, while a different balance of crust and toppings changes which part you need to watch.
Prepare the tray before the pizza goes in
Choose a baking sheet that fits the number of slices you want to reheat, then line it with aluminum foil. The foil's job here is easier cleanup, and it stays on the sheet through preheating and reheating. You're preparing the surface before adding any pizza.
Place the empty, lined sheet on a rack in the cold oven. Then preheat to 450°F with the sheet inside, following Whirlpool's oven reheating method (opens in a new tab). This lets both the baking sheet and its foil lining get hot before they meet the bottom of your slices.
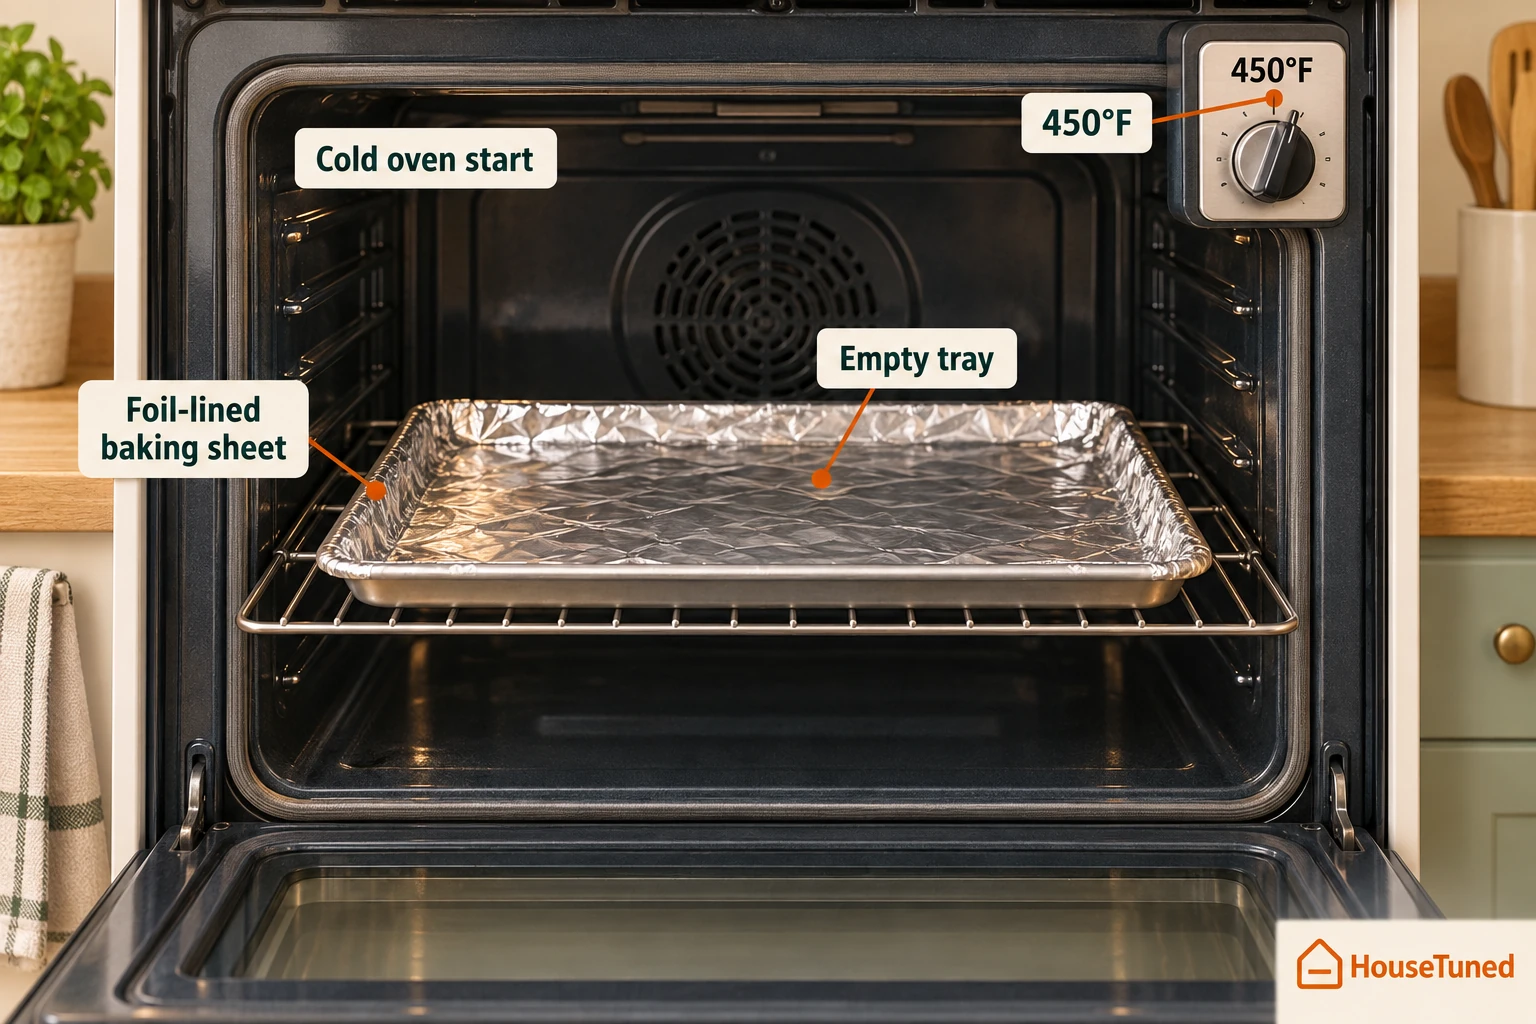
The distinction between an empty tray and a loaded one matters at this stage. The pizza goes onto already-hot bakeware later in the process, so preheating is preparation for crisping the bottom. It also comes before the pizza's reheating time when you're planning when to eat.
Load the hot sheet carefully
Once preheating finishes, carefully remove the baking sheet and arrange your slices on top. Handle it as hot bakeware even though it's still empty when you take it out: it has been heating along with the oven, and you're loading the pizza onto that heated surface.
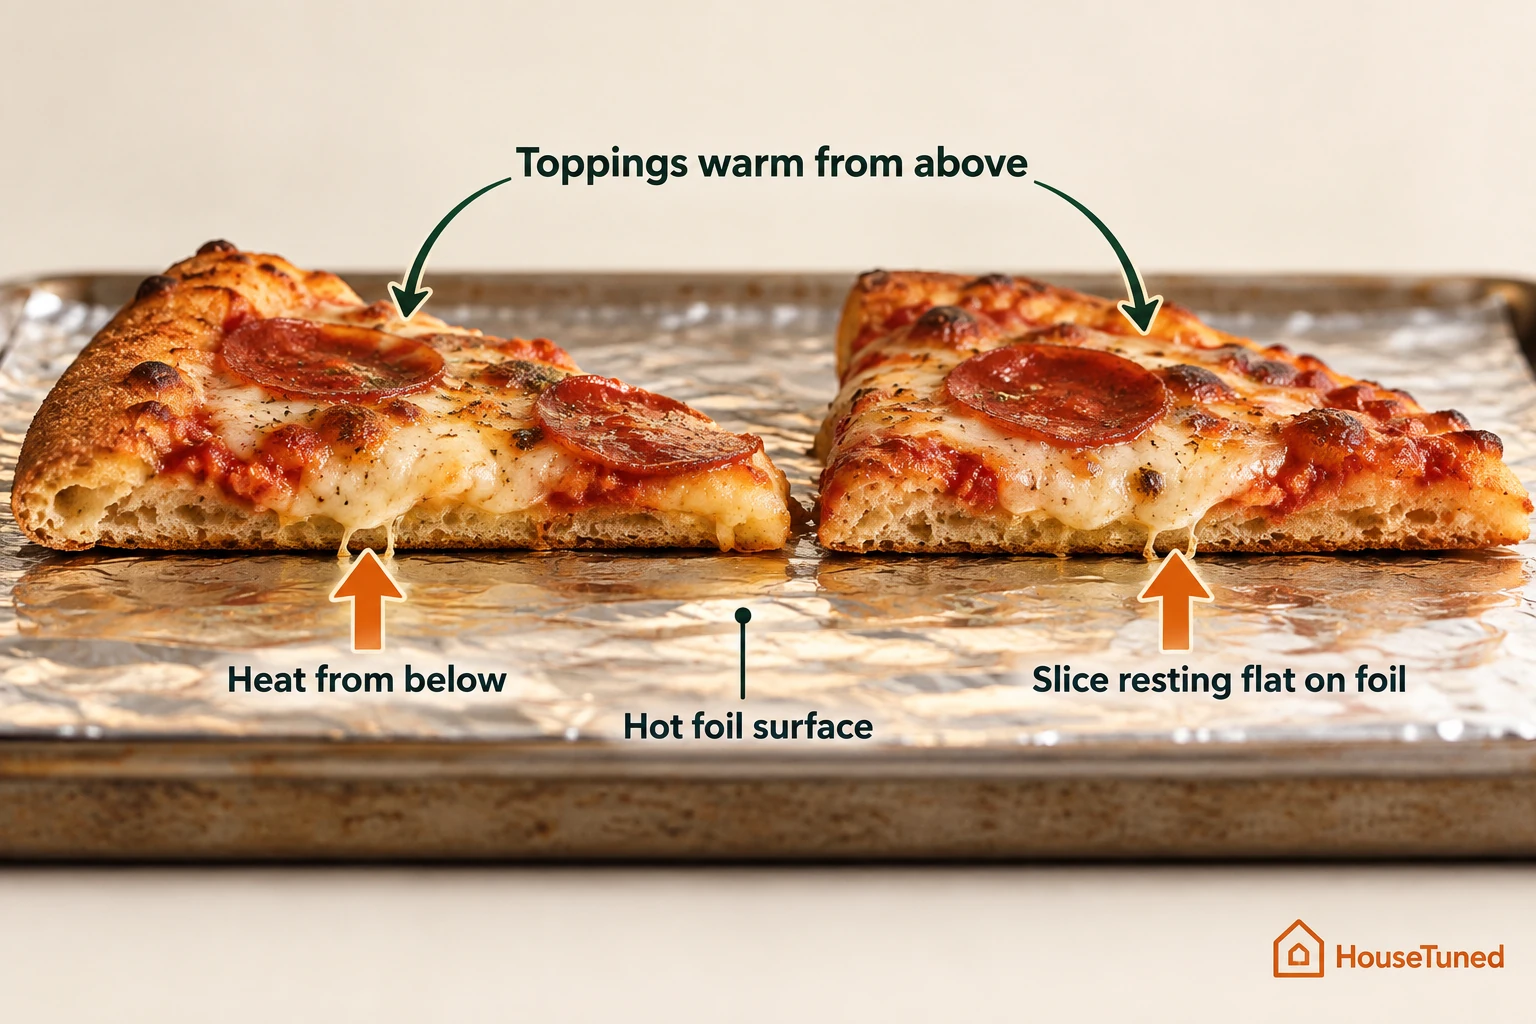
The benefit is at the point where the bottom crust meets the tray. While the toppings warm, the hot bakeware helps the base crisp up too. That bottom-up help is the reason the sheet went into the oven ahead of the slices.
Return the loaded baking sheet to the oven and heat until the cheese begins to bubble, about 10 minutes. You're looking for the beginning of bubbling as the next visible cue, then moving on to the crust check, rather than using a browned top as the endpoint.
Use the time as an estimate
Keep the approximate time attached to the pizza's progress. The broader 7–12-minute estimate covers variation in crust, toppings and oven temperature; the roughly 10-minute estimate belongs to this particular preheated-sheet method. Both leave room for the slice itself to determine when you move to the next check.
When you're deciding how long dinner will take, separate the oven's warm-up from the time the pizza spends reheating. The timing range starts after preheating. Counting the empty-tray stage as part of the pizza's heating time would mix two different parts of the process.
The clock helps you plan, while the cheese gives you a visible sign of how the top is coming along. The base gets its own assessment afterward. Keeping those jobs separate is useful when a slice looks melted on top but you're still deciding whether it has the texture you want underneath.
Heavy toppings can outlast a thin crust
Pay particularly close attention to a thin base carrying heavy toppings. The toppings will likely reheat more slowly than the crust, so an oven temperature that's too high can burn or dry the base while the top is still catching up. Watch both parts during this reheat.
That combination explains why thin pizza needs more thought than simply expecting a shorter wait. A thin crust can progress quickly, but a generous topping layer can still need longer. The amount above the crust matters as much as the thickness you can see at its edge.
For this combination, we'd give the condition of the base more weight than waiting out an estimated time, because the crust and toppings can get out of step. Whirlpool's advice for heavily topped thin crust (opens in a new tab) identifies that mismatch as the reason to monitor it closely.
Check whether the crust holds up
Once the cheese reaches the bubbling stage, assess how well the bottom supports the slice. Pick up a slice only after it's cooled enough to handle, or use oven mitts for this check. The handling precaution belongs here because you're moving from watching the pizza to physically testing its texture.
Look for drooping and an unstable crust as you lift it. Those are the signs that the bottom needs more crisping for this method. This check answers a different question from looking at the cheese: whether the base has enough structure for the slice to hold up.
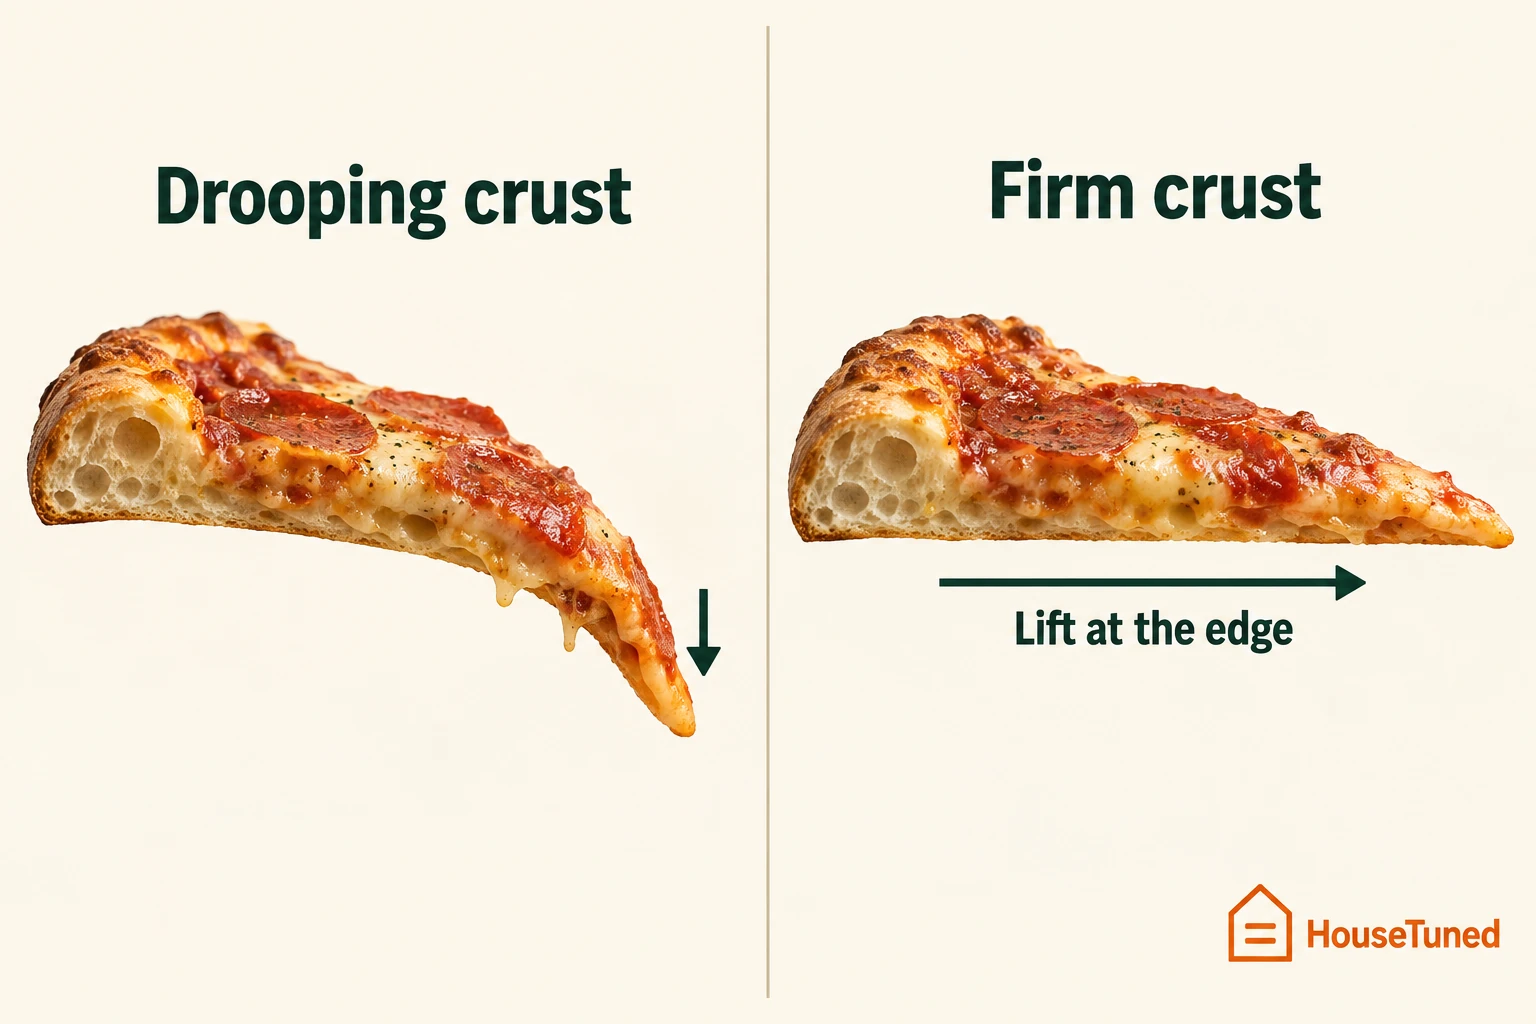
If the slice droops and the crust isn't stable, put the baking sheet back in the oven for a few more minutes, until the pizza reaches your preferred level of doneness. Let that remaining texture change guide the extension, and finish when the crust has the firmness you want.
More in this category