Choose the first check for your situation
- Check shipping materials, laundry balance, washer level and the basket or drum.
- For a washer you've already been using, begin with the load. For a new washer, begin with shipping materials.
- Load changes and leveling can help. Suspected internal problems need professional service.
If the banging began with a packed basket or one bulky comforter, we'd check the laundry first because either can throw the washer off balance. For a newly installed machine, we'd put shipping materials first because leaving them in can cause permanent damage.
Work through the checks that fit your situation before considering an internal repair. An overloaded basket, an unevenly balanced bulky load and a machine sitting unlevel are all possible explanations, and each points to a different correction.
The Maytag washing machine worked example below follows Maytag's general support guidance, including its leveling and pedestal checks. Keep your washer's owner's manual handy for model-specific troubleshooting details.
Check 1 is shipping materials on a new washer
Shipping bolts secure the wash basket during transport. They're useful while the machine is being shipped, but leaving them in during use can make a new washer shake violently. The installation check includes all shipping materials, not only the bolts.
Confirm that removal was completed during installation, using your machine's own instructions for the installation details. This check is especially relevant when you're dealing with a newly delivered washer: settle the shipping-material question before treating the shaking as a laundry-balance problem.
Whirlpool's new-washer guidance (opens in a new tab) gives that same before-another-cycle requirement. Once removal is confirmed, continued excessive shaking calls for the remaining load, level and basket checks.
Check 2 is the amount and balance of laundry
Look at both the amount of laundry and how its weight is distributed. An overfilled basket and a single large, absorbent item can both cause shaking, but they need different changes. Empty space in the basket doesn't rule out a load-balance problem.
For an overloaded basket, remove some items and spread the remaining laundry evenly throughout it. You're addressing two things together: excess laundry and uneven weight. Finish with a smaller load that's evenly dispersed, rather than leaving the remaining items gathered together.
For one bulky or very absorbent item, such as a comforter, add other items to help equalize the weight. This is the branch to use for an unbalanced single-item load, not a reason to add more laundry to an already overfilled basket.
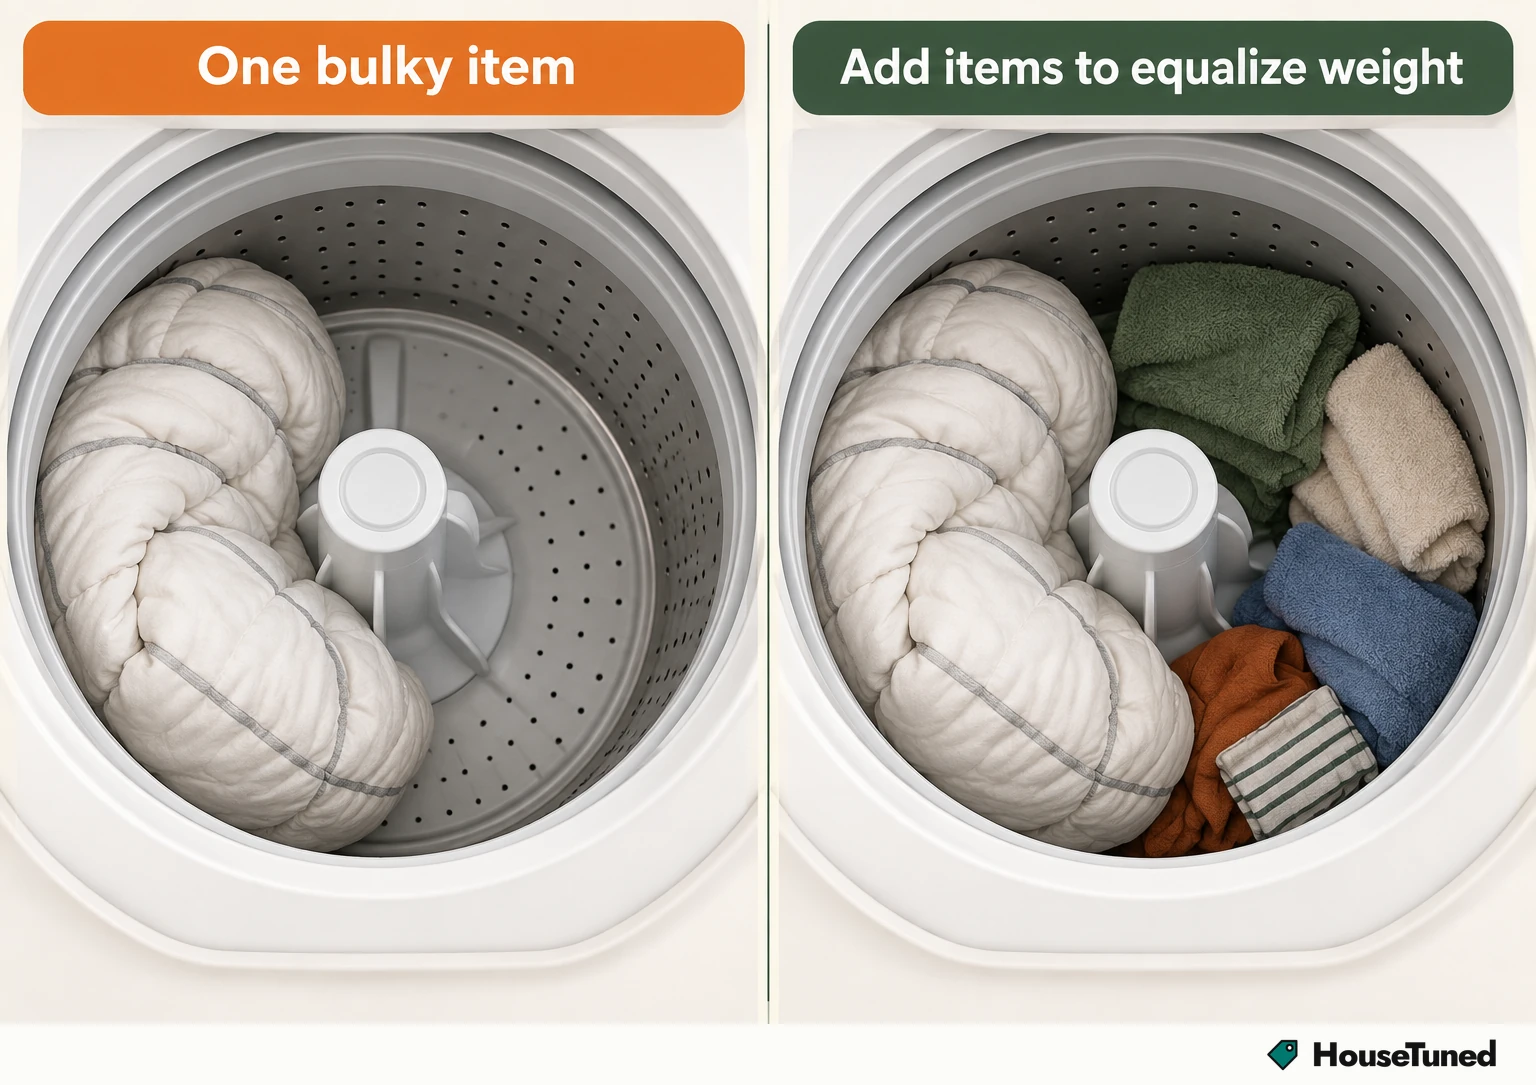
For the Maytag washing machine example, Maytag's load corrections (opens in a new tab) cover both situations. Choose the correction from what's actually in your basket: the goal is an evenly balanced load, and removing items isn't the answer to every loading problem.
Check 3 is level and four-foot contact
An uneven floor can leave the washer unlevel, creating vibration and noise even when the laundry is balanced. Check that all four legs contact the floor. Then use a level on top of the washer to check its position across the width and from front to back.
For this Maytag washing machine worked example, you'll use a level and a wrench or pliers. Maytag's tool list includes a 9/16-inch or 14 mm open-end wrench, or an adjustable wrench. Use your owner's manual for details specific to your machine.
- Place the level width-wise on top of the washer. Check whether the bubble sits between the two center lines.
- Turn the level front to back and take the second reading. You now have a level check in both directions.
- If adjustment is needed, turn the leveling legs with a wrench or pliers to raise or lower them. Tighten the jam nuts against the washer base as necessary, leaving them tight against the base.
- Recheck with the level, front to back and then side to side. The bubble should sit between the center lines in both directions.
Maytag's leveling guidance (opens in a new tab) includes checking your work after adjustment. That final reading gives you an observable result to work toward, instead of judging the washer's position by eye.
A pedestal belongs in the stability check
If your Maytag washing machine sits on a pedestal, include that support in the stability check. Make sure its mounting screws are tight, its feet contact the floor firmly and its foot lock nut is tight against the frame. Each of those checks belongs to the pedestal setup.
The leveling legs may be on the washer itself or its pedestal. Maytag's stabilization guidance (opens in a new tab) covers both, so apply the level check to the support your machine uses.
A storage pedestal also gives you another possible source of rattling. Check inside for loose contents that could roll or rattle during a cycle. That check helps separate a sound coming from stored items from movement of the washer itself.
For a Whirlpool washer with storage compartments, Whirlpool's storage check (opens in a new tab) calls for removing items that may roll around during washer cycles.
What improvement should look and sound like
A small amount of movement is normal, particularly during spin. Clothes move rapidly during that part of the cycle to remove water, so complete stillness isn't the target when you assess the result of your changes.
Look for a washer that stays in place without thumping, banging or loud vibration. Walking across the floor or jumping is a sign that the problem still needs attention, even though some ordinary spin vibration is expected.
If excessive movement continues after the loading and support checks, the next check is the basket or drum. It shifts your attention from the laundry and the machine's footing to visible or audible signs of an internal problem.
Check 4 is the basket or drum
On an older washer, loud banging or clanging during spin can come from worn shock absorbers or drum bearings that let the basket or drum become unbalanced. These are possible internal causes after you've considered the load and how the machine is supported.
In the Maytag washing machine example, look through the washer opening to see whether the basket or drum is visibly centered. Then try moving it manually and listen for grinding or clanking. Notice both its position and the sound, since they're separate observations you can report.
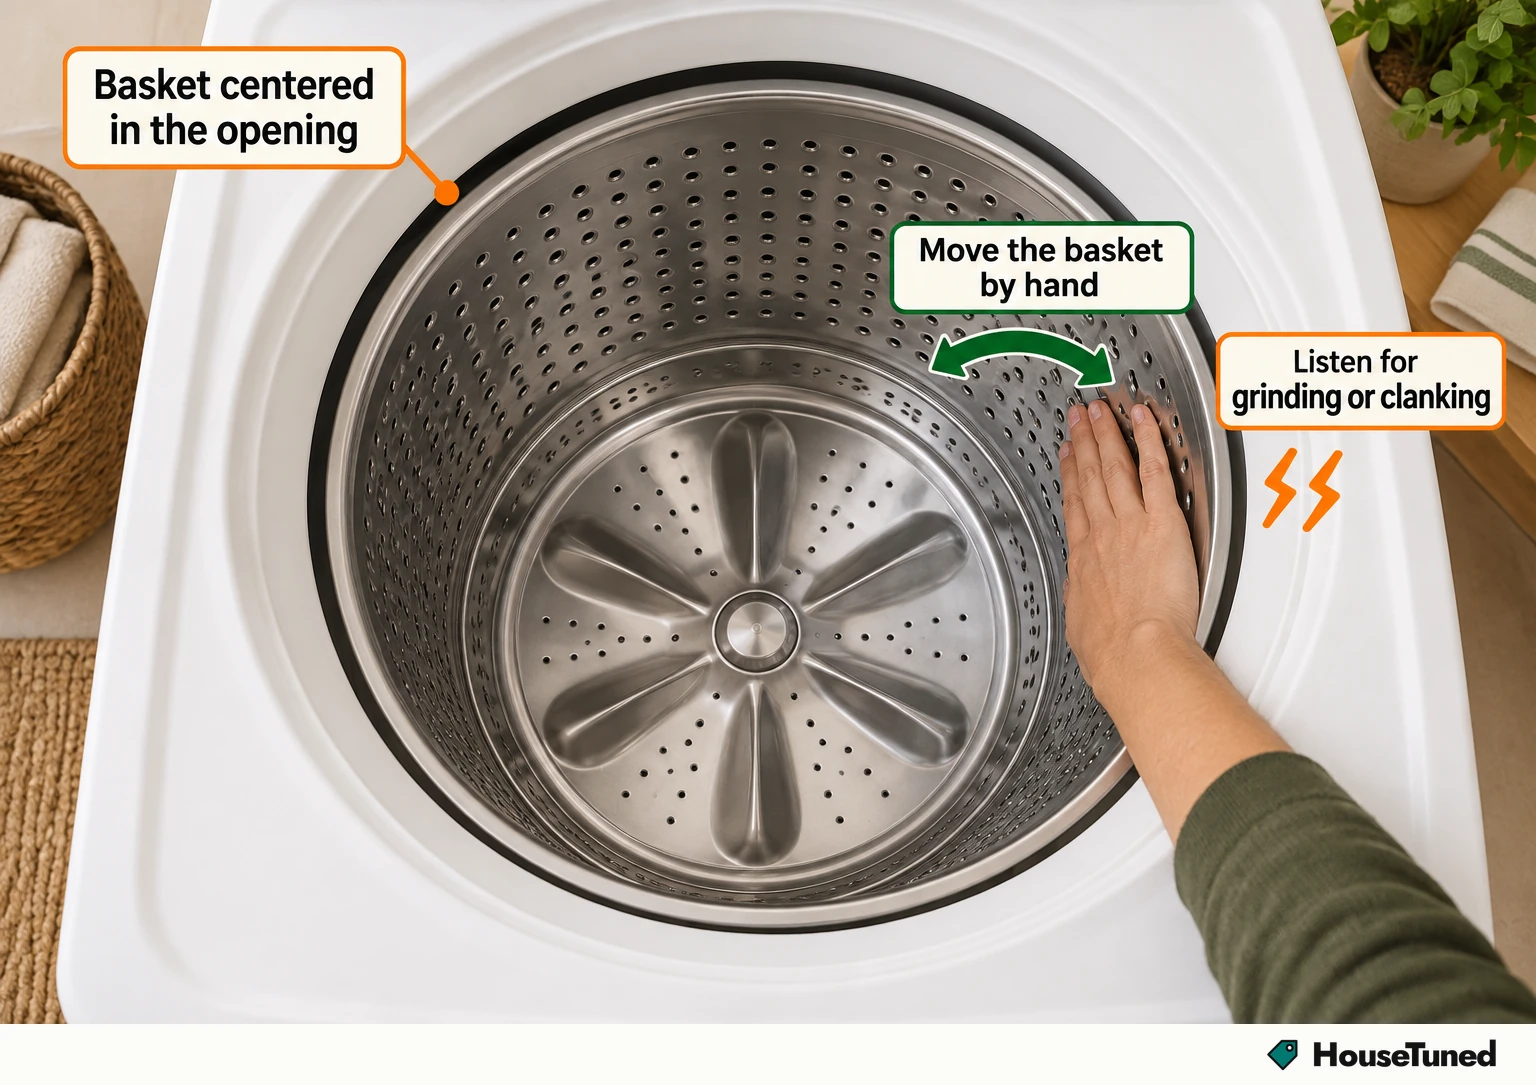
Whirlpool's basket and drum check (opens in a new tab) covers both top-loading and front-loading washers. It uses the same centered-position and manual-movement observations, so this fourth check concerns the wash basket or drum in either layout.
Who to contact for an internal problem
If you suspect a loose basket or drum or another internal problem, schedule a service appointment with the manufacturer. Grinding or clanking when you manually move the basket or drum is a reason to arrange professional service.
For a Maytag washing machine, contact Repair and Replace Services through Maytag's shaking-washer guidance (opens in a new tab). That's the service route for the Maytag example.
For a Whirlpool washer, use Whirlpool Customer Care through Whirlpool's service guidance (opens in a new tab) to connect with a technician. Tell the technician whether the basket looked off-center and whether moving it produced grinding or clanking.
More in this category