Check the space before unpacking
- Check the space, water supply, drain and power outlet against your washer's requirements first.
- Unpack the washer, connect the drain and inlet hoses, and check for leaks before positioning and leveling it.
- Plug it in once it's level, then complete your machine's startup instructions before the first load.
An empty laundry spot still needs to suit the washer you've bought. We'd check the measurements and hookups before unpacking, because machines differ in size and setup requirements, even when they're going into an existing laundry space.
Keep your machine's manual beside you for its dimensions and specific directions throughout the job. Use its guidance for operating the water shutoff valve safely, too. For a Whirlpool washer, you can use your model number to find your washer's documents (opens in a new tab) through product help.
Allow room for the door or lid
Measure the available space with a ruler or tape measure and compare it with your machine's dimensions. A front-loader needs room for its door to open in front, while a top-loader needs room above for its lid. Include that opening space when deciding whether the washer fits.
Leave at least 1 inch of free space on each side, allowing more if your model requires it. Check those model-specific clearances before settling on the final position, so your measurements include the required gaps as well as the machine itself.
Every washer needs a water source and somewhere to drain. Most use both hot and cold water intakes, so check your machine's requirements when deciding which supply connections and hoses you'll use.
- Inspect the available water inlets against your washer's requirements.
- Choose the suitable standpipe, sink or other drainage point.
- Confirm that the existing power outlet is appropriate for the machine.
Gather your parts, tools and help
Check what's included with your washer before gathering the remaining parts. Inlet hoses aren't supplied with every machine, so you may need to buy them separately. The general parts list includes two inlet hoses, a drain hose, transport-bolt hole plugs and a U-shaped hose form, with your machine's directions determining which parts you'll need.
Have the tools handy before moving the washer toward its hookups. You'll use the measuring tools for fit and leveling, while the applicable bolt, hose and foot work calls for wrenches or pliers.
- Adjustable wrench, socket wrench and pliers.
- Level and a ruler or measuring tape.
- Wood block and bucket.
- Utility knife, plus a flashlight if the laundry area is dark.
Arrange for two or more people to move and set up the washer because of its weight. Keep your helper involved through unpacking and positioning, including any tipping your machine's unpacking directions require.
Remove packaging and shipping hardware
Bring the washer near the laundry area and remove the outer packaging with your utility knife. Open the lid or door and take out any setup materials stored in the drum, leaving the drum clear before proceeding.
Use your machine's unpacking directions to determine how to remove base packaging and shipping hardware. Transport bolts hold the drum still during shipping. Where fitted, remove them with a socket wrench and install the hole plugs where required.
On Whirlpool washers whose unpacking directions call for tipping onto the back, have your helper assist with the tip, remove the base packaging, complete the bolt and plug work, then return the machine upright. Follow your own washer's specified unpacking position for this stage.
Give the drain hose a clear route
Unwind the drain hose and, if needed for your model, the power cord. Connect the hose to the standpipe, sink or other suitable drainage point you selected. The attachment arrangement depends on your washer and the drain you're using.
Fit a U-shaped hose form or other attachment parts if your machine requires them. Follow its directions for the connection details, so the hose is attached using the parts and arrangement intended for that setup.
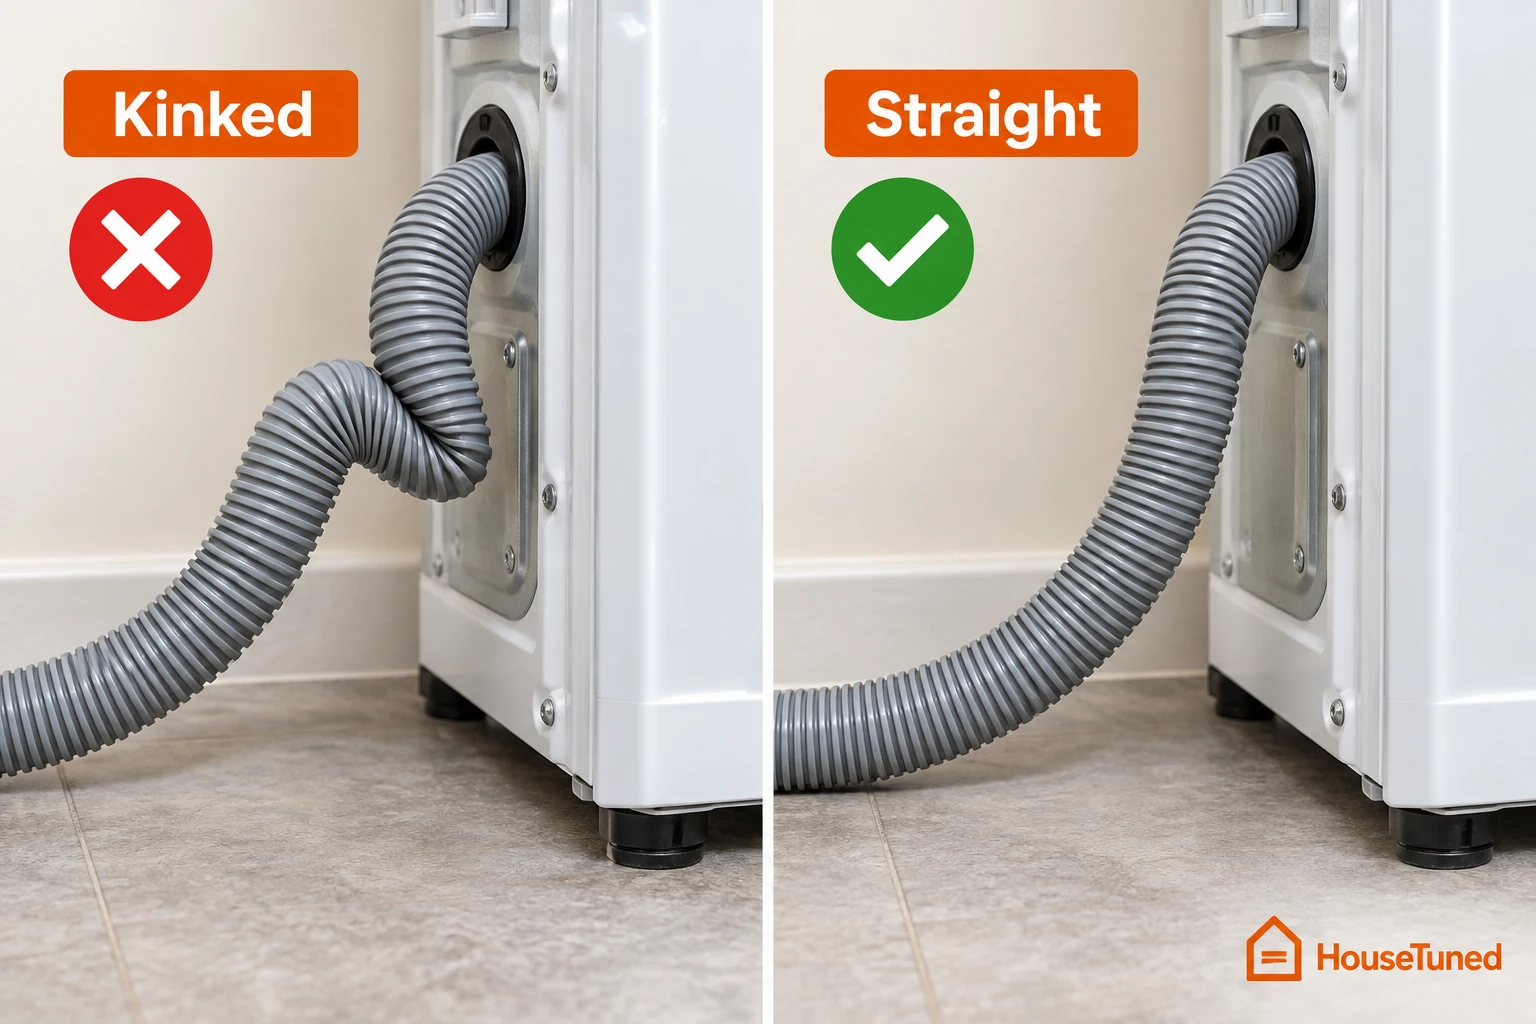
Check the hose along its route for kinks or other blockage and leave a clear path for the water to drain. If you're also dealing with an existing drainage problem, work through the checks for a washer that won't drain.
Connect the water and check for leaks
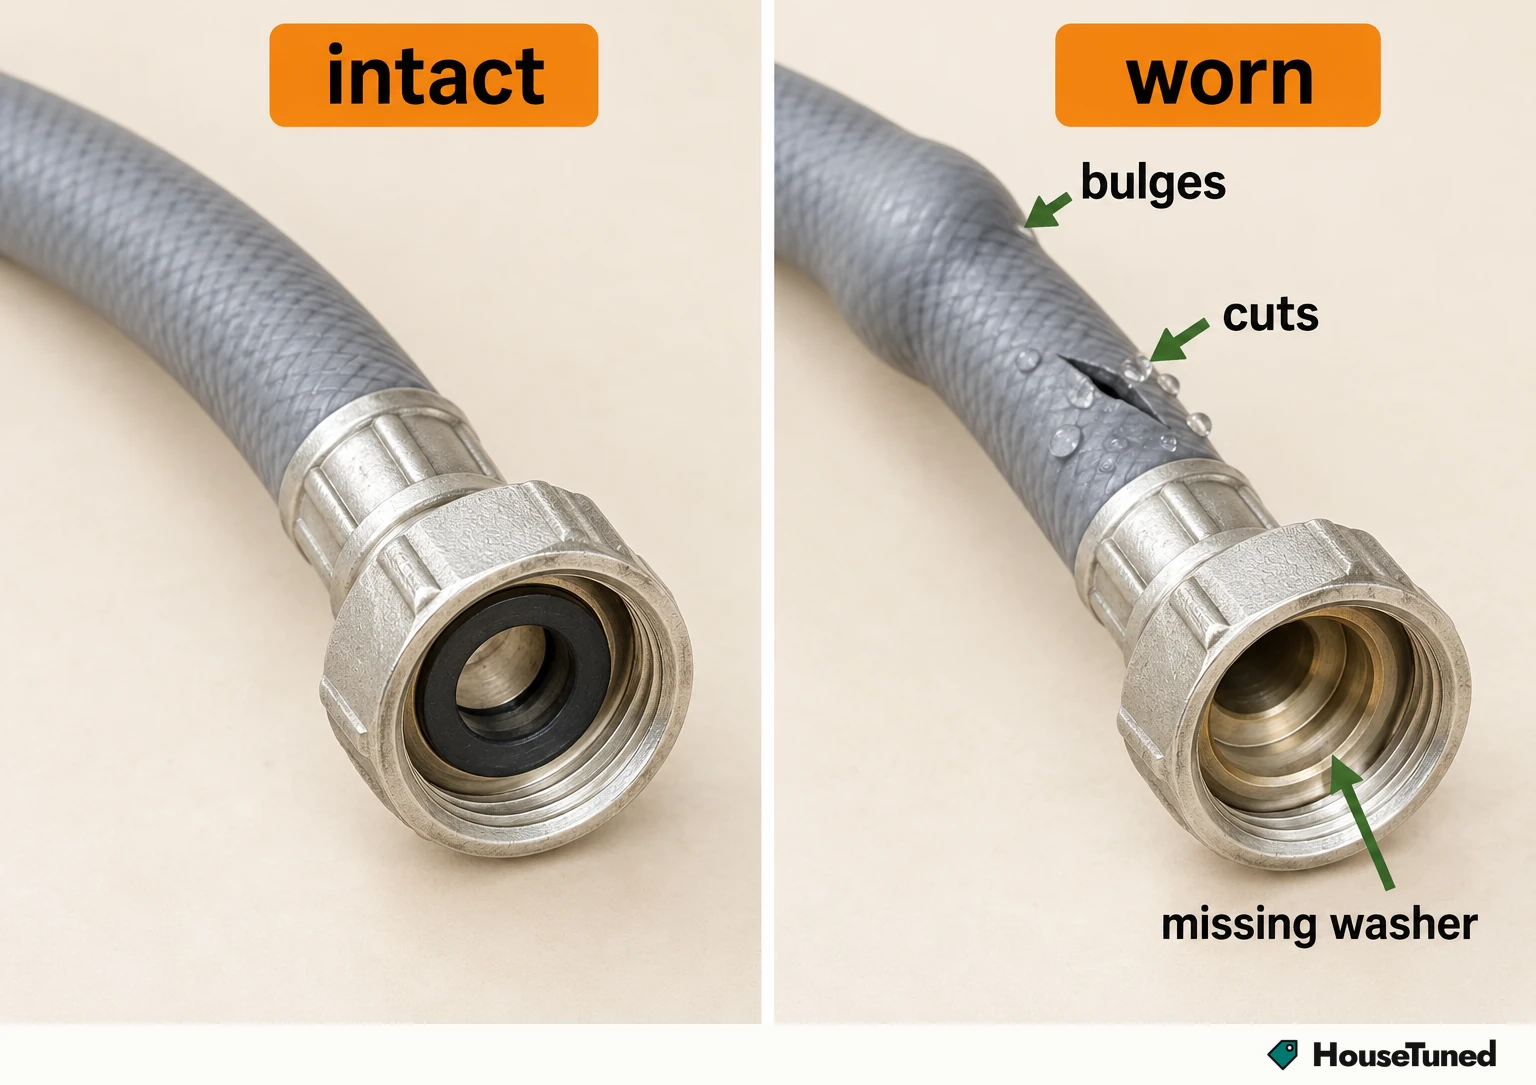
Inspect reused inlet hoses before attaching them. Replace hoses after five years of use to reduce the risk of failure, and replace any hose with bulges, kinks, cuts, wear or leaks. Keep checking their condition periodically after the washer is in use.
When replacing hoses, check that old sealing washers aren't stuck on the machine's inlet valves. Use new washers in the new hoses to make a proper seal, and mark the replacement date on the label with a permanent marker.
- Attach the applicable inlet hoses to the water source with your pliers or wrench, following your machine's directions. The supply ends are connected before you attach the washer ends.
- If you choose to flush the hoses, run water through them into a bucket for a few seconds to help avoid clogs. Collect the flushed water in the bucket before making the remaining connections.
- Attach the other hose ends to the back of the washer and tighten with your pliers or wrench as directed for your machine. Each hose now connects the supply to a washer inlet.
- Turn on the water and inspect the inlet hoses and their connections for leaks. Look for dry hoses and connections before moving on.
If water appears during that check, work through the washer leak checks before continuing with setup.
Level the washer in its final position
Shift the washer into its final position, then place your level front to back and side to side. Check both directions before deciding whether the feet need adjustment. The goal is a level machine with all four feet resting on the ground.
If adjustment is needed, prop the washer up with a wood block and adjust the feet using your wrench. Return the machine to standing on its feet and check the level again in both directions.
Check that the washer doesn't rock back and forth. If it rocks or either level check is off, continue adjusting and checking until all four feet support the machine and it stands level without rocking.
Connect power and complete startup
Once the washer is in place and level, plug it into the appropriate wall outlet you checked earlier. Keep this power connection after the positioning and leveling work.
Before adding your first load, check the owner's manual for any further setup or startup actions required for your make and model. Complete those actions before beginning the laundry.
More in this category