Plan for at least a day without the vacuum
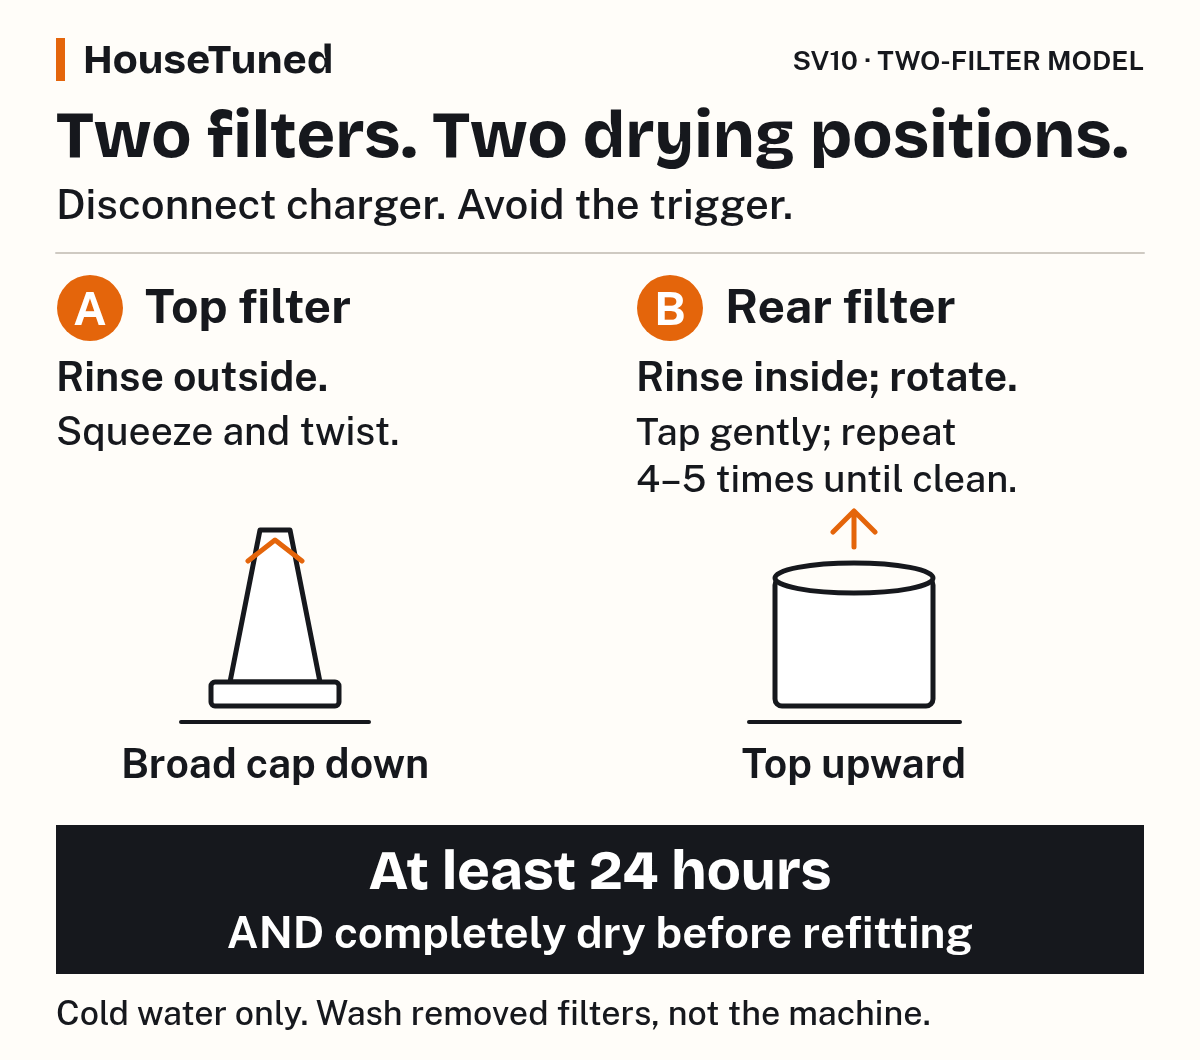
- Take the vacuum off the charger, lift filter A out of the top and twist filter B off the back.
- Rinse both in cold water only, with no soap and no trip through the dishwasher or washing machine.
- Let each filter dry for at least 24 hours, and longer if it's still damp.
- Don't run the vacuum until both filters are back in.
Your SV10 shouldn't run while either filter is out, and each one needs at least 24 hours to dry. We'd wash both on the same day, so the vacuum is only out of action once.
These steps are for the SV10 with a top filter A and a rear filter B, as shown in Dyson's SV10 operating manual (opens in a new tab). If your machine's filters look different, follow your own model's manual instead.
With dry hands, take the vacuum off the charger, and keep your fingers off the ON trigger so it can't start while you work. Only the removed filters go under the tap. Wipe the main body with a dry cloth instead.
Rinse filter A from the outside
Filter A is the one on top, and it gets rinsed on the outside.
- Lift filter A out of the top of the machine.
- Run cold water over the outside of the filter until the water runs clear.
- Squeeze and twist it with both hands to get the excess water out.
- Leave it to dry with its broad cap down on the surface and its narrow tip pointing up. Give it at least 24 hours, and longer if it's still damp.
Rinse filter B from the inside
Filter B is at the back, and this one gets washed from the inside, with a few rounds of rinsing and tapping.
- Twist filter B counter-clockwise to the open position, then pull it away from the machine.
- Wash the inside under cold running water, turning the filter so the water reaches all the pleats.
- Tap it gently against the side of the sink several times to knock out debris. Repeat the rinse and tap four to five times, until the filter is clean.
- Stand it upright with its closed top facing up, and leave it to dry completely for at least 24 hours.
Refit them only when both are completely dry
Keep filter A broad cap down and filter B top up while they dry. Before you refit either one, check two things: at least 24 hours have passed, and the filter is completely dry. If it's still damp, give it more time.
Once both are dry, put filter A back into the top of the machine and make sure it's seated properly. Then return filter B to the open position and twist it clockwise until it clicks into place.
Never run the vacuum without the clear bin and both filters fitted.
Wash them at least once a month
Wash both filters at least once a month to keep the vacuum performing well. You may need to wash them more frequently if you vacuum fine dust, use the machine a lot, or mostly run it in Powerful suction mode.
More in this category
Take a closer look
More from the home desk