A clean screen is only part of the job
- Check your model's care instructions, then clean the exhaust path with a dryer brush and vacuum hose, including the detached hose and outside outlet.
- These steps apply to vented Whirlpool and Maytag dryers. A ventless dryer needs its own care procedure.
If you've been removing lint from the screen but clothes are taking longer to dry, we'd give the exhaust vent attention next because lint buildup there can restrict airflow. Plan the job around access to both ends, since cleaning only the outdoor opening leaves the interior side needing attention.
Before you begin, check the care instructions for your exact model, as Maytag's US vent-cleaning guidance (opens in a new tab) directs. The steps below follow Whirlpool and Maytag's general vent-care guidance, with the finishing-cycle timing kept separate for each brand.
Find the exhaust path and gather your tools
Look behind your dryer for the ventilation hose or ductwork, then locate its exhaust outlet outside. The removable lint screen, most likely near the dryer door, is a separate part from that hose and outdoor outlet.
Whirlpool identifies siding and roofs as typical exterior outlet locations. If you have a ventless or condensing dryer, it recirculates air through the drum instead of using this exterior exhaust path, so follow its own care instructions.
Gather tools that let you loosen lint and collect it. Maytag permits a brush from a dryer-cleaning kit or a similar-sized cleaning brush, so you don't need to choose a particular branded kit to follow its brushing procedure.
- A dryer-cleaning brush or similar-sized cleaning brush.
- A vacuum with a hose attachment to collect lint and dust.
- A screwdriver if your vent clamps require one.
Disconnect the supplies before moving the dryer
Turn the dryer off and unplug it from the wall before cleaning or adjusting the vents. Disconnecting power prevents accidental operation while parts are removed or disconnected.
Whirlpool's US cleaning instructions (opens in a new tab) include that gas-specific preparation before the vent work. Arrange any assistance you need at this point so the supplies are dealt with before you begin detaching the exhaust hose.
With another person's help, move the dryer about one foot away from the wall. That space gives you room to clear debris from the ventilation system, and getting help protects both you and the appliance during the move.
Detach the hose at both ends
With the dryer away from the wall, look at the connections securing the hose. Unscrew the clamps, using a screwdriver if needed, or remove the attaching tape.
Detach the hose from both the dryer and the wall. That gives you separate access to the outlet at the back of the dryer and the inside of the hose, both of which Maytag's vent-cleaning procedure (opens in a new tab) includes.
Brush the interior and collect the lint
Work on the dryer outlet, detached hose and vent interior. The brush loosens lint, while the vacuum hose collects dust and debris in harder-to-reach areas, including crevices.
Use Whirlpool's hand, brush and vacuum sequence (opens in a new tab), keeping Maytag's gentle brushing guidance in mind as you work along the vent.
- Remove large pieces of lint by hand so the bulky debris is out of the vent.
- Gently clean the dryer outlet and work the brush inside the detached hose and vent. Follow the vent's turns to draw out remaining lint and dust.
- Use the vacuum hose to collect loosened debris and lint or dust trapped in crevices.
Give the turns attention as well as the straight opening. Maytag's cleaning method follows those turns to collect lint and dust throughout the vent interior.
Clear the outside duct and replace its cover
At the exterior outlet, remove the vent cover to reach the ductwork. Take out large pieces of lint by hand, then run the dryer-cleaning brush along the inside and collect remaining debris with the vacuum hose.
Continue until the ductwork is free of debris, then replace the cover. Keeping the cover replacement in this step completes the outdoor portion of Maytag's US vent-cleaning procedure (opens in a new tab).
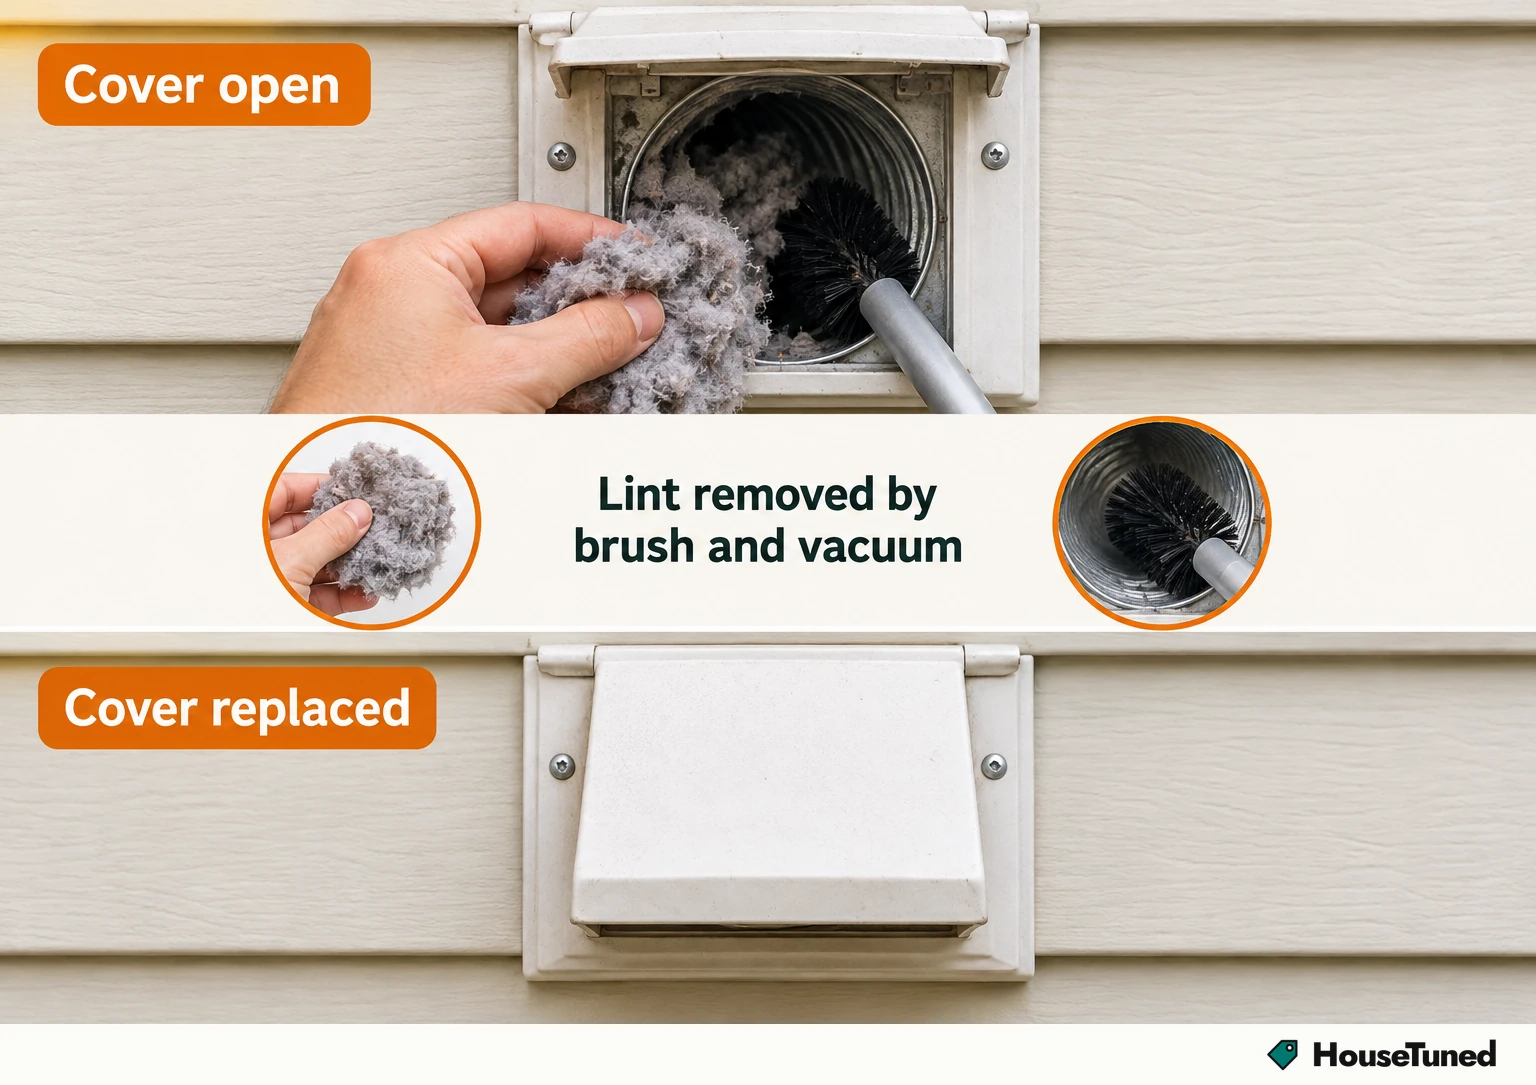
If you can't move your dryer, you can clean from the exterior wall, but the interior side still needs cleaning too. Hire a professional if necessary to complete that access and cleaning.
Reconnect the vent and run an empty cycle
Back inside, clean up remaining lint around the appliance. Secure the vent pipe between the wall and dryer, re-clamping or re-taping the connection as applicable before restoring the supplies.
Plug the dryer back in. For a gas dryer, the reconnection sequence includes turning the gas valve back on. If a professional handled the gas-line preparation, have them handle its return to service too.
With another person's help, gently slide the dryer back into place. Keep the drum empty for the finishing cycle, which clears residual dust and debris from the vent system.
Maytag specifies roughly 15 minutes for that empty cycle. Whirlpool specifies 10 to 15 minutes (opens in a new tab). Use the timing for your brand along with your model's care instructions.
Keep the screen clear after every load
After every use, pull the lint screen up to remove it, gently lift off the lint by hand and put the screen back. A screen blocked with lint can increase drying time, so this remains a regular job between vent cleanings.
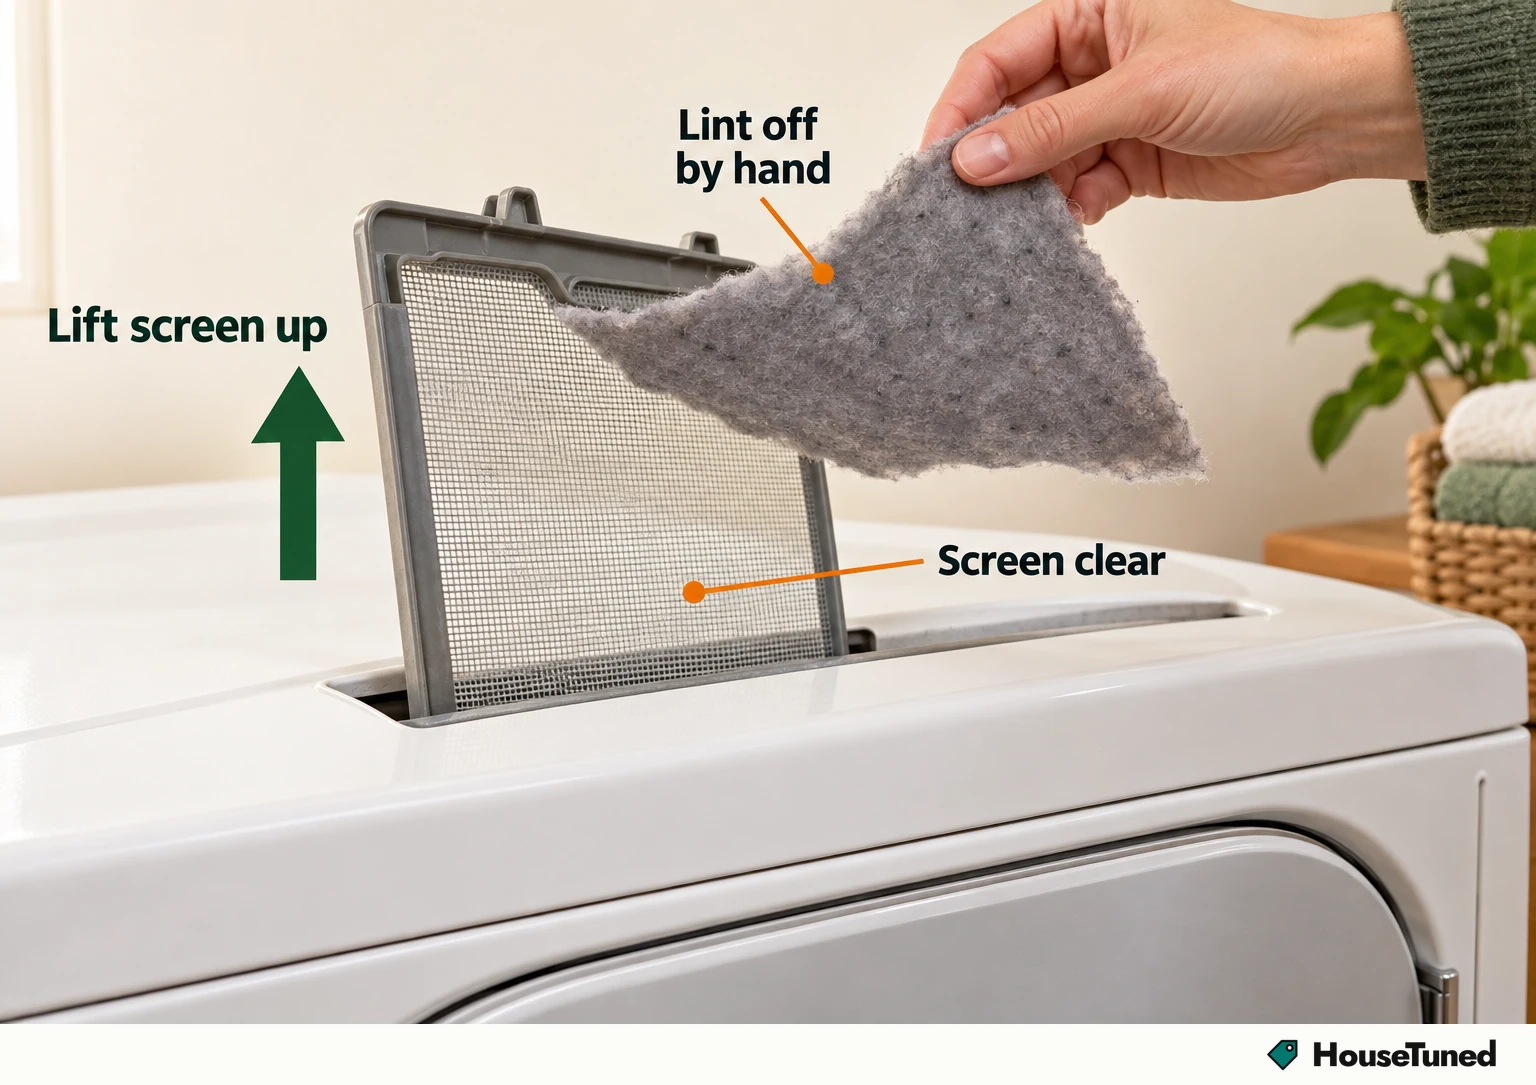
Keep routine lint removal dry. Don't scrub the screen or use water, because wet lint is harder to remove. Whirlpool's US screen-care guidance (opens in a new tab) gives this dry method for after-use cleaning.
Plan the next cleaning around use and performance
Plan to clean the vent and ductwork at least once every two years, unless your model's care instructions give a different schedule. Whirlpool's US maintenance guidance (opens in a new tab) also recommends considering more frequent cleaning when loads start struggling to dry.
Maytag ties the interval to dryer use and whether the ventilation becomes clogged. Longer drying times, clothes that aren't drying, indoor moisture or lint buildup, unusually hot clothes and a slight charred scent without an obvious source are reasons to give the vents attention.
Dust and lint buildup can affect performance and pose a fire hazard. Routine cleaning helps maintain airflow and can reduce that risk, so vent care belongs on your maintenance schedule even before drying performance changes.
If you have maintenance concerns or prefer someone else to handle the job, contact a service professional. Maytag's US vent-care guidance (opens in a new tab) includes professional maintenance as an option for both gas and electric dryers.
More in this category