Which shoes can go in?
- Check your shoes’ care instructions first. Canvas, nylon, cotton and polyester are usually washable, but the label decides.
- For eligible shoes, prepare the soles and removable parts, protect the load, then use a cold Delicate cycle with slow or no spin.
- Finish by air drying completely before putting the shoes back together.
A dirty pair can look ready for the laundry basket while its material or trim calls for different care. We’d make the care label the deciding check, because a fabric that usually tolerates washing can still come with shoe-specific cleaning instructions.
Canvas, nylon, cotton and polyester are generally durable enough for machine washing and laundry detergent. Read the cleaning directions before you start removing dirt or choosing a cycle, and use the washer only when those directions allow it.
Keep leather, suede, rubber and vinyl shoes out of the washer, along with sports shoes that have rubber or metal cleats. These are exclusions in Whirlpool’s shoe-washing guidance (opens in a new tab), even though other footwear can go through a wash cycle.
For silk or other delicate materials, beading, embroidery, sequins or similar decoration, take the shoes to a shoe repair and cleaning specialist. That’s the stop point for this washer method: specialized care helps avoid damaging the fabric or embellishments.
Give the laces their own bag
Remove the laces if possible before preparing the rest of each shoe. They can be machine washed, but loose laces need their own protection against tangling or wrapping around parts inside the drum.
Put them in a mesh garment bag and close it securely before washing. The closure matters here: the bag needs to contain the laces throughout the cycle, not simply hold them while you carry everything to the machine.
If there’s stubborn dirt on the laces, work on it with laundry detergent and a soft brush. Whirlpool’s lace-cleaning method (opens in a new tab) includes this manual scrubbing option, so you can address those marks while the laces are out.
Clean the insoles by hand
Take the insoles out and clean them by hand unless their care instructions say otherwise. Machine washing can leave insoles waterlogged, which can stretch their drying time into days. Keeping them out of the shoe wash also lets you handle their cleaning and deodorizing separately.
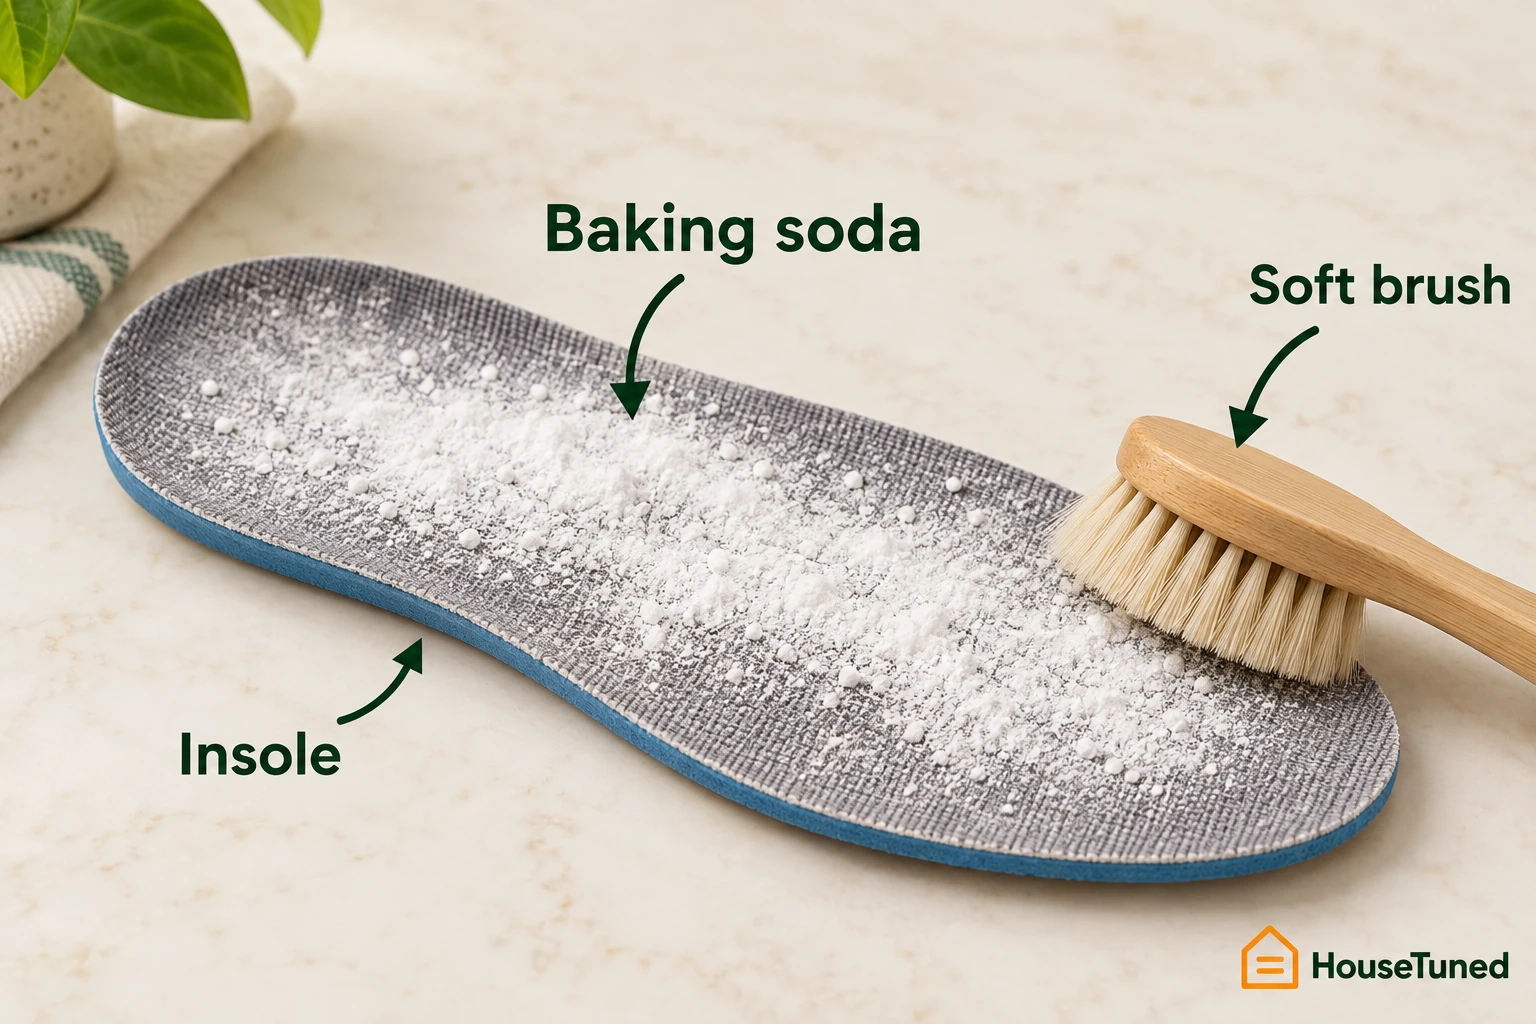
Use Whirlpool’s insole treatment (opens in a new tab) for insoles that aren’t machine washable. It combines a light cleaning with moisture removal and an overnight baking-soda treatment.
- Wipe the insoles with a soft brush or rag and slightly soapy water, working over the surfaces that need cleaning.
- Use a sponge to absorb as much excess moisture as possible, leaving the insoles less wet.
- Sprinkle them with baking soda and leave them overnight to help deodorize them and absorb remaining moisture. In the morning, brush off the baking soda.
Clear the soles before loading
Work over the soles with a soft brush to remove as much excess mud and debris as possible. An old toothbrush is one suitable tool, so you can use it for the smaller areas as well as the more open parts of the sole.
For dirt caught in tight spaces, use a toothbrush or toothpick carefully. The aim is to lift out the trapped debris before bagging the shoes; keep that careful handling as you move between the small recesses.
Once the dirt is off, you can address scuffs with shoe cleaner on a rag or soft brush. Gently rub the cleaner onto the marks, then wipe it away with a damp rag, following Whirlpool’s sole-cleaning approach (opens in a new tab).
Protect the shoes and balance the load
Place the prepared shoes in a mesh garment bag. This helps limit forceful tumbling that could damage them during the wash. If you don’t have a mesh bag for the shoes, a pillowcase is an alternative that helps keep them contained and reduces tumbling.
Put the bagged shoes into the washer with a few old towels to help balance the load. Choose towels that are already old: newer towels can release excess dye and stain your shoes, so their colorfastness matters to the finished result.
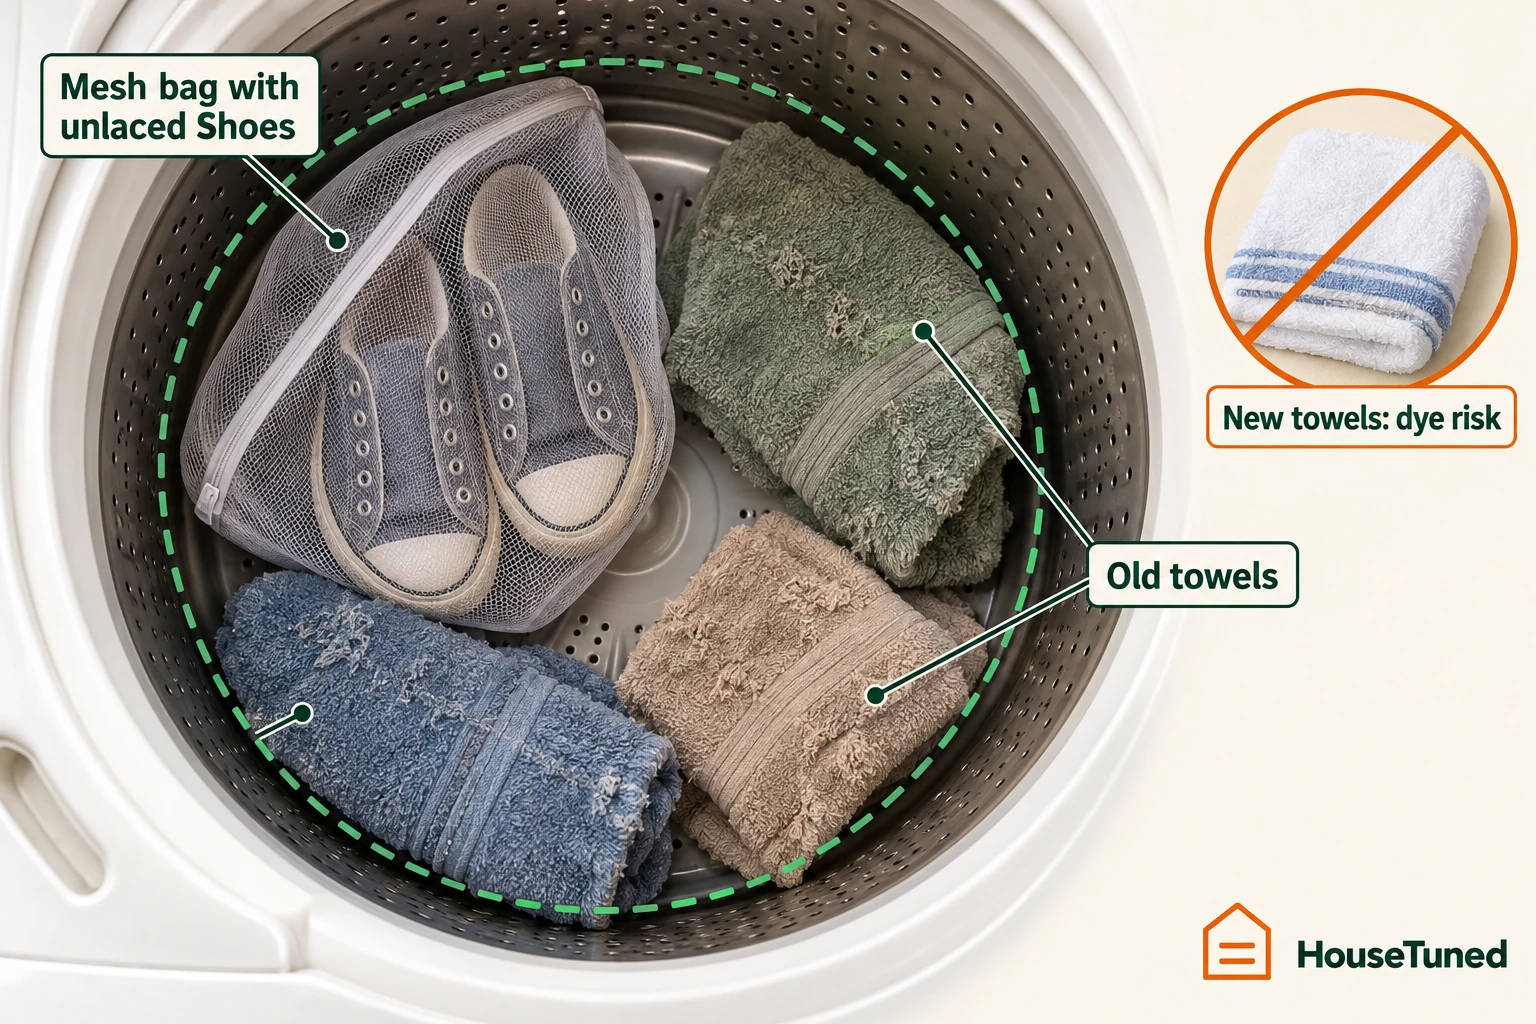
The protection serves the machine as well as the footwear. Whirlpool says shoes are unlikely to damage the washer when they’re contained in a mesh bag or pillowcase and washed on a cold, gentle cycle. Keep those conditions together when following its protected-loading guidance (opens in a new tab).
The Whirlpool washers settings example
With eligible shoes prepared and the load protected, select Delicate, cold water, and a slow-spin or no-spin option. These are the settings in Whirlpool’s published blog method for washing shoes (opens in a new tab), which is the Whirlpool washers example used here.
Keep the shoes’ own care instructions in charge of the wash. Hot water can shrink shoes; the cold, gentle approach helps prevent shrinking and damage. A hotter setting isn’t the next step for a pair that still looks particularly dirty.
Whirlpool puts the Delicate wash at about 45 minutes to one hour. That estimate covers the machine portion of the job, so leave room in your plans for the separate drying stage before you’ll need to wear the shoes again.
Choose and measure the detergent
Choose liquid laundry detergent or laundry pods for this wash. Powder can get stuck inside the shoes if it doesn’t dissolve properly, which is why Whirlpool’s shoe method recommends those two alternatives (opens in a new tab).
Measure the detergent and follow its manufacturer’s directions for the amount to use. Dirty shoes aren’t a reason to add an extra pour: too much detergent can produce excessive suds, and those suds can sometimes stop a washer from pumping out water or spinning.
Use the product’s stated dose as your guide before starting the cycle. Whirlpool’s detergent precaution (opens in a new tab) makes measuring part of preventing that avoidable wash problem.
Wait for complete dryness before reassembly
When the cycle finishes, take the shoes and laces out of their bags and let them air dry. You can stuff the shoes with clean rags or paper towels to absorb excess moisture and help hold their shape while they dry.
Choose air drying instead of trying to hurry the shoes along with high dryer heat. Whirlpool’s drying guidance (opens in a new tab) warns that high heat can shrink and damage them.
Allow at least overnight, and be prepared for drying to take a few days. Whirlpool gives both the overnight expectation and the longer possibility, so use complete dryness as the finish point rather than a set number of hours.
If the shoes are still damp, keep them air drying. Once they’re completely dry, put the cleaned insoles back in and thread the laces through again.
More in this category